Have you ever dreamed about a miniature garden at home that will provide you with fresh herbs, veggies, leafy greens, and flowers all year long? Well, there is such a thing, and it’s called AeroGarden.
It’s a device that uses water, nutrient solution, and LED lighting to create a microclimate for the seed pods that germinate in 1-2 weeks and are fully ready for harvest in 1-1,5 months. The process is very simple, and the nutrient solution is patented by the manufacturer, so you don’t have to look for a specific mix.
You can grow herbs and vegetables about 5 times faster than in soil. The device is stylish and very functional. It doesn’t use a lot of electricity and has timers for lights. Besides, you’re notified by a blinking light when more nutrients or water is needed.
Not sure yet?
Well, we weren’t either until we decided to test the system and grow tomatoes (which can be quite challenging). In soil, you need to wait for 6 months before harvesting your first plant babies. With AeroGarden, we got the first edible tomato after 13 weeks. You can wait for the first harvest in 12-14 weeks.
How cool is that?
To help more people get into home growing, which has tons of benefits, we decided to write this guide compilation and answer most questions about AeroGarden later in the Pro Tips and FAQ section.
If you want to get more information about Aerogarden you can read my article too, Aerogarden review aerogarden harvest indoor hydroponic system.
Let’s grow!

If you are interested in Grow with AeroGarden you can also be interested in indoor hydroponic systems to help you easily start growing plants and grow tomatoes all year round. Our top articles: Our Picks for the 5 Grow Tent Kits, Picks for the 5 Aeroponics Systems, Our Picks for the 5 Hydroponic Bucket Systems with Buyer’s Guides, and Our Picks for the 5 best indoor vertical Garden, and Led Grow Lights for an indoor plant, and The Best Hydroponic Tower for Indoor Garden.
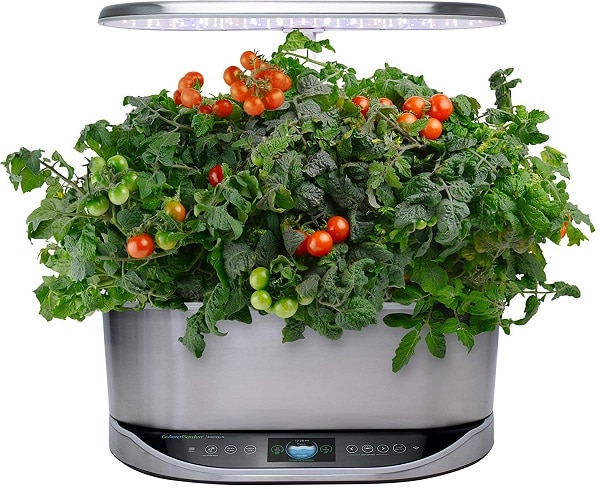 AeroGarden Bounty Elite - Indoor Garden with LED Grow Light
- WiFi and Alexa Compatible, Stainless Steel Grow up to 9 plants, up to 24duim
- Includes everything you need to grow
- 50 watt LED Grow Lights, perfect spectrum for fast growth & big harvests
How to Use Aero Garden: A Compilation of Step-by-Step Guides
Here, we’ll see how you can easily grow tomatoes, cilantro, and strawberries using your AeroGarden.
How to grow AeroGarden tomatoes?
If you follow the user’s manual and use a proper solution, the process won’t be a problem. It will get a little time-consuming as the tomatoes “grow up,” but the result is worth the time and effort.
You will need:
- An AeroGarden model of your choice;
- Seed pods;
- Nutrient solution;
- Tomato seeds;
- Clean water.
Aerogarden Set Up (Aerogarden Instruction Manual)
Step 1: Preparing the Device
If you’re using a brand-new device, you can skip this step. But if it’s not your first garden, you have to clean and sanitize the system. You can do it with vinegar or a mixture of water and bleach and just clean the bowl and other details.
You can find out how to clean the parts with or without a dishwasher easily in the Pro Tips section. Make sure there’s no residue and no bleach left after the cleaning.
Then, proceed and add the necessary amount of water.
Step 2: Setting Up the Light
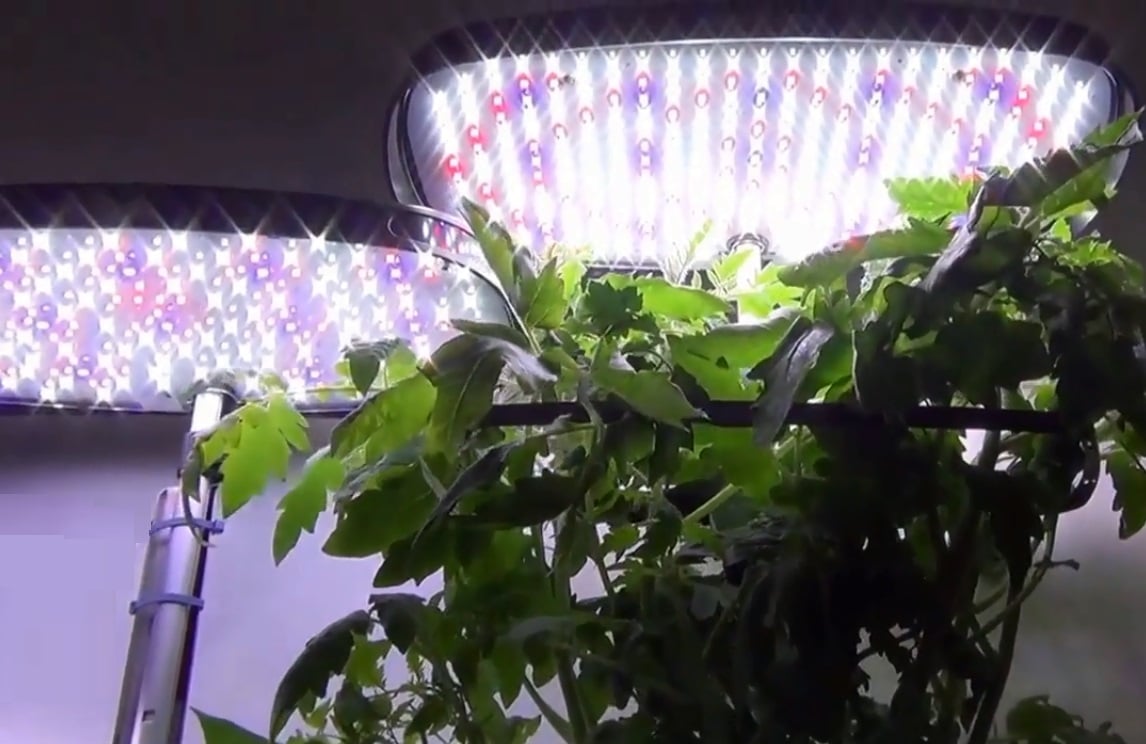
Tomatoes don’t require a lot of bright light, so set the LED lighting on minimum, but move it close to the pods. You’ll need about 16 hours of such light a day. The beauty of such a device is that you don’t have to set up timers on your phone and remember to switch the lights on and off. Just set the times on the device, and it will do everything for you.
Move the hood as the plant starts to grow so that it doesn’t become an obstacle. 1-2” between the top leaf and the LED lights is enough space.
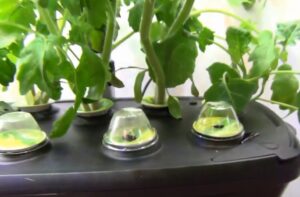
Step 3: Planting the Seeds
One thing you should remember about tomatoes is that they love space. When planting the seeds, leave enough space between them, or use seed pods, missing one slot after every pod. If you want to maximize the results, plant something else in those empty slots.
For example, basil doesn’t need a lot of space, so you can fill the empty ones with basil for your salads!
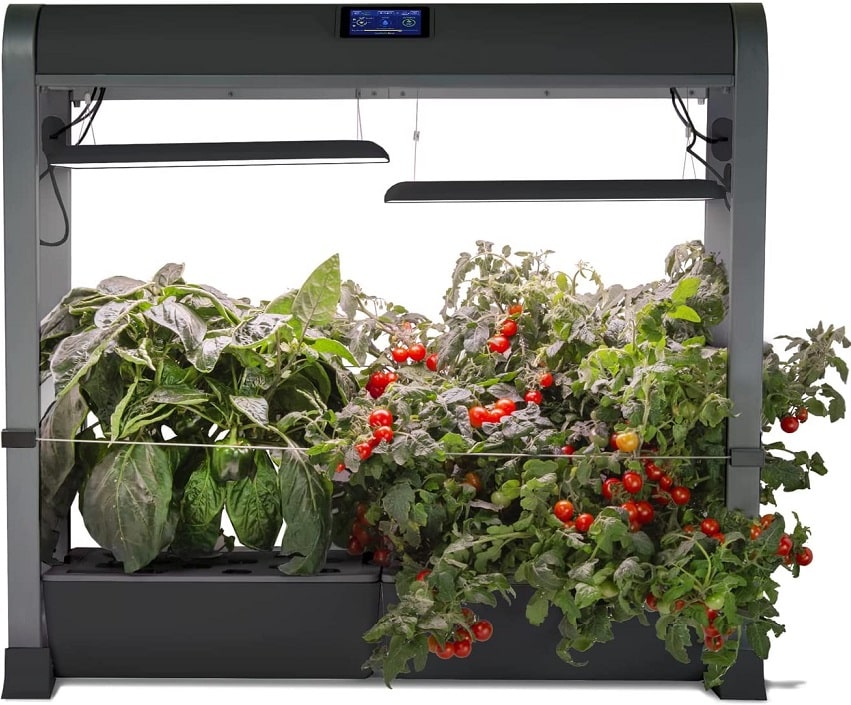
AeroGarden Farm 24Plus with Salad Bar Seed Pod Kit - Indoor Garden with LED Grow Light, Black
- Indoor Garden with LED Grow Light, Black, Automatic timer makes sure the lights go on and off
- Adjustable grow height of 24Inch, and can be stacked with other Farm gardens
- Includes two Salad Bar Seed Pod Kits, featuring 9 lettuce pods, 3 herb pods, and 12 tomato pods
Step 4: Add Nutrient Solution
A patented Liquid Nutrients solution is the best for AeroGarden. In the instructions, you’ll see just how many cups are needed for the number of tomato plants you want to grow. Make sure to read that instruction for the best results and to avoid wasting time and money.
There are also nutrient tablets, so if you want to buy them instead of liquid, use one for 3 plants in your AeroGarden. Both options have a longevity of about 14 days. You may not need to remember this if you switch the nutrient notification on. When you see the reminder, change the nutrients, and reset the device to let it know you’ve updated the solution.
Step 5: Trim and Trick Into Pollination
As the plants start to grow, remove the domes to avoid creating obstacles. As you get 2” of growth, it’s recommended to remove all the weak sprouts to make sure the healthy ones have enough space to develop. Be very careful not to do any damage to the healthy plant.
As to the pollination process, there are likely no bees inside your house, so you can act as a bee a little bit. No flying; just shake the plant a little bit and/or blow on it lightly. Don’t do any heavy-duty work; be careful not to shock the plant.
Aerospring 27-Plant Vertical Hydroponics Indoor Growing System
- Easy to use aeroponic system for your home
- Fan - Grow Lettuce, Herbs, Veggies & Fruits
- Grow smart & eat healthy, 20 gallon water reservoir Grow Tent, LED Grow Lights
Step 6: Prune the Plant
About 4 weeks in, you will need to start the pruning process. It’s done in two steps:
- If the flowers are blooming, you can skip this part and proceed to the second step of pruning. Count 5 branches from the bottom and cut the stem off a little higher. Regular scissors are fine for it but make sure they are clean and sterilized beforehand; you don’t want to harm the plant;
- Cut off all the branches that grow into the lights or out of the lighting reach. Remember, there has to be 1-2” of space between the lighting hood and the top leaf. The branches that grow into the light will block it, harming the plant. Those growing outside of the reach won’t develop very well and will just waste nutrients and energy.
Step 7: Providing Support to Heavy Branches
Oftentimes, tomatoes grow too heavy for their branches, but you can support them. Take a string of natural material and tie the branches that seem to be overloaded. Tie them loosely to the lamp arm or any other sturdy object that is close to the system.
Make sure you do this step because if a branch with green tomatoes breaks, they won’t ripen.
Step 8 (Optional): Transfering the Plant Outside
You can transplant your tomatoes outside if you wish. Here’s how:
- Trim it as much as possible;
- Leave one healthiest and strongest stem (up to 5 branches);
- Trim the roots in the same way you trimmed the tops of the plant before;
- Choose and leave the strongest ones;
- Use shears to get the plant our of the pod;
- Plant it outside;
- Water the plant.
Only transfer the plants outside if there’s about 75F (24C).
Aerogarden Directions, How to grow AeroGarden cilantro?
Growing cilantro is a challenging task. The algorithm is the same:
- Prepare AeroGarden;
- Install seed pods;
- Pour water and nutrients;
- Set the timer for lighting.
The problem with it is that the germination process may take as long as 5-8 weeks. This often happens due to the tough hulls around the seeds that don’t give them enough softness and space to germinate properly. You can soak them in water overnight to fix the issue.
There’s another recommendation we can give: Try to pour some water right down the hole and put a regular, clean quarter on top of the seed sponge. Check for germination progress once or twice a week, and remove the quarter once you see the sprout.
This recommendation might sound weird, but it works for a lot of home growers. Once you harvest your first cilantro, you’ll know what works best and will be able to achieve faster results the next time.

How to grow AeroGarden Strawberries?
Strawberries won’t cause you any problems. They are quite beginner-friendly, and the best AeroGarden models to use for them are Ultra and Bounty.
These berries like a dry environment and grow best in such conditions. For great results, get a Grow Bowl that is only suitable for the models mentioned above. The manufacturer is ready to provide as many recommendations as possible, but they state that the company doesn’t guarantee 100% germination.
 Lettuce Grow 36-Plant Hydroponic Growing System Kit
- Large Home Organic Gardening with Self Watering with Pump, BPA Free and Food Grade
- Outdoor Indoor Vertical Garden Herb Vegetable Planter Tower
- All the gear: farmstand tower, water pump, power cord, timer; and Nutrients for 130+ Plants
That being said, most of the time, even total beginners succeed.
The most ergonomic way to grow strawberries using a device is to start not with seeds but with small plants that can grow flowers. You don’t have to germinate seeds yourself; it’s better to buy ready-to-grow crowns.
There are two methods that are definitely going to work from here on.
The First Method of Growing Strawberries
What you need:
- An AeroGarden device (Ultra or Bounty);
- A grow bowl for your model;
- Crowns;
- Coco medium (comes with the bowl).
The bowl has all the instructions on how to start, so even if you’ve never done anything like this before, you’re covered. In short: you have to set up the bowl, put the medium inside, and put your crowns there. Be very gentle; the plants are right from the nursery.
The Second Method of Growing Strawberries
What you need:
- An AeroGarden device (Bounty or any other Farm model);
- A special Grow Anything kit from the same company;
- Crowns.
In this case, the step-by-step is a bit longer:
- Rinse the roots very gently to get rid of the debris and soil. Use room-temperature water;
- See the size of the roots. If they are too tiny, cut a grow sponge in half to make it shorter;
- Very gently, put the roots in the wet sponge. The crown should be above the sponge. If the roots are too heavy, put the crowns right in the grow basket;
- Put the sponges in the bowl and install them onto the growing deck;
- Pour water and nutrients and press the Reset button so that the device knows you’ve renewed the food;
- In 14 days, the timer will show you that the berries need more food. According to the manual, pour new nutrients and reset the timer in the same way.
The plants will show in 7-10 days! And then, all you have to do is wait for the strawberries to grow and ripen.
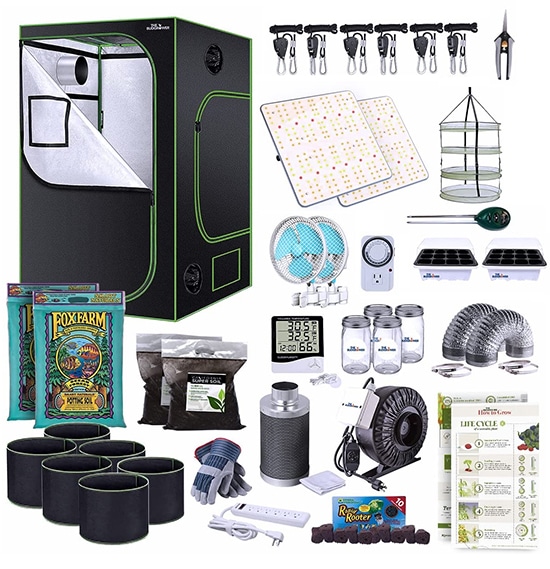 TheBudGrower Complete All-in-One Home Grow Solution 4x4x7ft- 2200W(2)
- LED lights specialty manufactured by VIVOSUN with Samsung LM301 diodes for FULL spectrum light
- The industries most durable grow tent – heavy duty 1680d oxford cloth
- Money & energy saving complete home grow tent kit
Tips for happy and healthy AeroGarden strawberries:
- Take care of the garden, always change nutrients when needed;
- Keep the water clean, fresh, and topped up;
- Don’t forget to adjust the height of the lights as you see progress in growth. 2-4” between the leaves and the lights is fine;
- Prune the plants when necessary;
- Remove old and dead leaves, don’t panic when you see them turning brown; it’s totally fine; the nutrients go higher to the newer leaves. The best way to remove the old leaves is to cut them right at the base;
- Keep the surfaces clean from dead leaves and other debris to make sure no harmful bugs are going to feed on them and your healthy plant;
- Rinse the bowl once a month or more often if necessary.
Conclusion
AeroGarden is an amazing device that can bring your hobby to a completely new level. It’s relatively easy to use and will bring you fresh air and delicious food.
But before you go, let us know if you loved the article. What useful information did we manage to give you? What’s your experience with AeroGarden? We’re looking forward to hearing from you ASAP!
Happy Growing!
AeroGarden Pro Tips and FAQ
Here you’ll find additional bits of information about AeroGarden. If more answers are needed, you can always contact the company directly or refer to the user manual of your own device.
Here are TOP 5 plants you can grow using your AeroGarden:
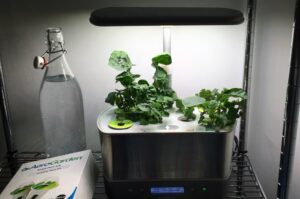
AeroGarden Harvest is one of the models the company offers to home growers. It uses 20W LED lighting and provides space for your plants to grow up to 12”. It's suitable for tomatoes, lettuce, herbs, etc. Expect to grow 6 plants or less 5 times faster than if you’d grow them in soil. The device reminds you when the plants need more water or nutrients, which is very convenient if you’re busy all the time. It’s super-easy to grow using this system:
Clean your AeroGarden every time before inserting a new Seed Pot Kit to get rid of excess residue that the last harvest left. It’s recommended to remove the roots of the old plants carefully to not harm or throw away the filter by mistake. Here’s how to clean it: Then, there are two ways to follow. Cleaning with a dishwasher: Cleaning without a dishwasher:
As time goes by, you may need new LED lights, a pump, or another detail as a replacement. Easily contact the manufacturer or order on the official AeroGarden Store website from the Accessories section. You can also find a lot of replacements on Amazon if it’s easier for you to use that service.
Cr: Amazon AeroGarden Harvest is one of the models the company offers to home growers. It uses 20W LED lighting and provides space for your plants to grow up to 12”. It's suitable for tomatoes, lettuce, herbs, etc. Expect to grow 6 plants or less 5 times faster than if you’d grow them in soil. The device reminds you when the plants need more water or nutrients, which is very convenient if you’re busy all the time. It’s super-easy to grow using this system:
Cr: Amazon AeroGarden Sprout is one of the models you can buy for growing healthy veggies, salad herbs, and greens, as well as flowers. This is a small countertop garden, which is not only easy and convenient to use but also very cute. You don’t need any pesticides or herbicides, only water, and nutrients. The latter are solutions patented by the company, so quality is guaranteed. Energy-efficient LED lighting is used in this system, needing only 10 watts and providing your plants with suitable lighting for maximized growing rates. All you have to do is to buy the system, install it using the manual included in the package, pour water and nutrients in a small reservoir that will nurture the pods with your future plants, and choose the LED regime: Installation takes minutes, and you need no tools. Just put the Seed Pots in the machine, add a mix of nutrients and water, and wait for results. Compared to soil-growing, you can achieve a 5-times faster result with the Sprout system. The device reminds you when to add nutrients and can switch the lights on and off automatically.
What are the best things to grow in AeroGarden?

Imagine making a salad and picking herbs right from your own mini home garden. They are always fresh, non-GMO, and don't contain any harmful chemicals. They grow 5 times faster than in soil and are always nearby. You get around $150 worth of herbs in a month without any special skills.
Green, juicy, and always fresh leaves for any salad. They grow very fast even in soil, so imagine having them ready in several days. These plants are great for beginners who are only familiarizing themselves with hydroponics, aeroponics, and such small home gardens.
Purple, red peppers, chili peppers, jalapeno, and all kinds of tomatoes can be grown using AeroGarden devices at least 50% faster than in soil. Supplying nutrients right to the roots of the plants, the device creates a microclimate suitable for flourishing quickly.
Eggplant or broccoli, anyone? Purchase seed pots and grow anything you want using AeroGarden. As the plants become too large for a small home garden, just transfer them to the backyard to continue growing. Six weeks of wait, and you have fresh, nutritious vegetables.
Home-grown flowers are much better than a bouquet that fades after a week or so. Imagine that you can grow several types of flowers and have them blooming and blessing you with odor all year long. Powerful LED lights will provide enough lighting for them to grow big and gorgeous.How to grow in AeroGarden Harvest?
How to clean AeroGarden?
Where to get AeroGarden replacement parts?

How to grow in AeroGarden Harvest?
How to grow using AeroGarden Sprout?
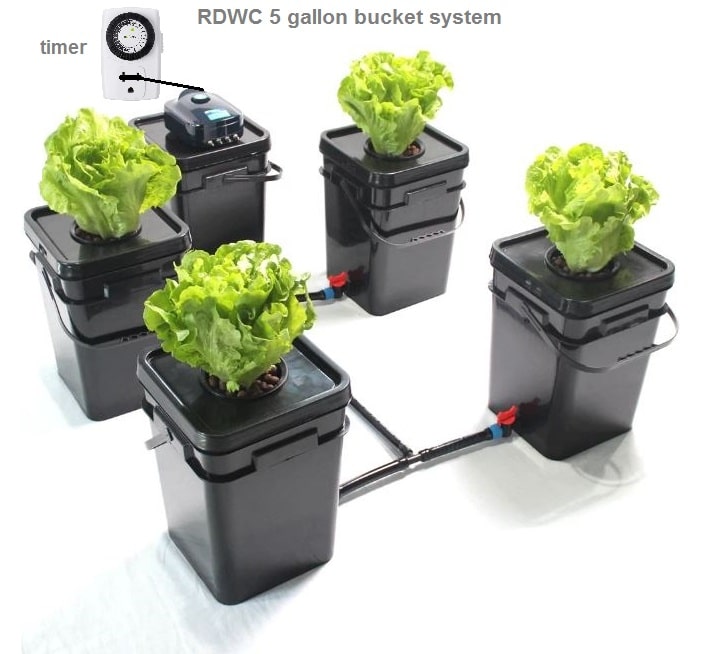
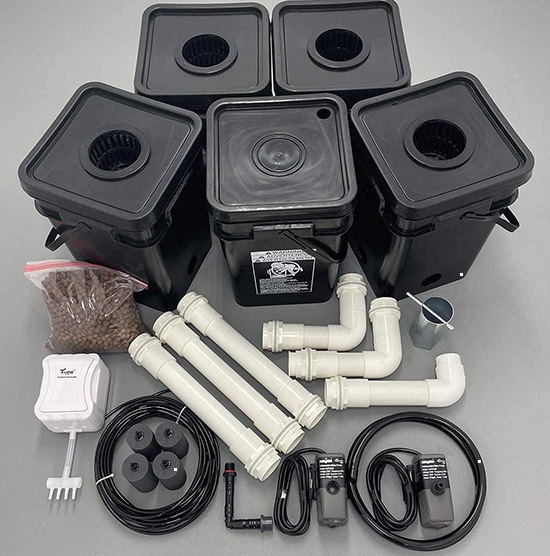 Recirculating Deep Water Culture (RDWC) Hydroponic Grow Kit System
- Reservoir Bucket Connected to 4 Grow Buckets
- 400 Gallon/hour Circulating Pump
- Large 5 gallon square buckets, pre-drilled

![Best AeroGarden of [date template="Y"]](https://hydrogardengeek.com/wp-content/uploads/2021/06/aerogarden-5-348x240.jpg "Best AeroGarden of [date template=\"Y\"]")


