Hydroponic drip systems are a popular and efficient way of growing plants in a soil-less environment. These systems use water, nutrients, and a growing medium to nourish plants and promote their growth. In this article, we will take a closer look at hydroponic drip systems, their benefits, and how to set them up step-by-step.

If you are interested in Hydroponic Drip Systems you can also be interested in indoor hydroponic systems to help you easily start growing plants and grow tomatoes all year round. Our top articles: Our Picks for the 5 Grow Tent Kits, Picks for the 5 Aeroponics Systems, Our Picks for the 5 Hydroponic Bucket Systems with Buyer’s Guides, and Our Picks for the 5 best indoor vertical Garden, and Led Grow Lights for an indoor plant, and The Best Hydroponic Tower for Indoor Garden.
What Is a Hydroponic Drip System?

A hydroponic drip system is a type of hydroponic system that uses a network of tubes and drip emitters to deliver water and nutrients directly to the roots of plants. Unlike traditional soil-based gardening, hydroponic drip systems don’t use soil as a growing medium. Instead, plants are grown in a nutrient-rich solution or growing medium, such as perlite, vermiculite, or coconut coir.
In a hydroponic drip system, the nutrient solution is stored in a reservoir and then pumped through a series of tubes to the drip emitters, which release the solution directly to the plant roots. This allows for precise control over the amount of water and nutrients that each plant receives, resulting in faster growth, higher yields, and better-quality produce.
From my experience, Hydroponic Drip Systems are highly efficient and can be used to grow a wide range of plants, including vegetables, herbs, and fruits. They are ideal for indoor gardening, as they require less space and water than traditional gardening methods. Additionally, they are environmentally friendly, as they use less water and fertilizer and produce less waste than soil-based gardening.

 HIRALIY 65.6FT/20M Automatic Drip Irrigation Kits with Garden Timer
- 1/4
- Auto Plant Watering System for Patio Lawn, Watering Regularly by Timer
- No-leaking Two-ways Adapter
How Does the Drip System Work?
A hydroponic drip system works by delivering a nutrient-rich solution directly to the roots of plants through a network of tubes and drip emitters. Here is a step-by-step breakdown:
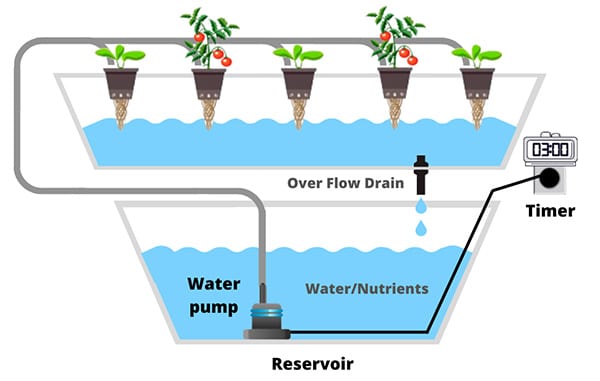
- The nutrient solution is stored in a reservoir, which is typically placed below the growing containers.
- A water pump is used to pump the nutrient solution from the reservoir to the plants. The pump is connected to a timer that controls the frequency and duration of watering.
- The nutrient solution is delivered to the plants through a series of tubes. The tubes are usually made of plastic and are connected to the pump.
- The drip emitters are attached to the tubes and are positioned above the plant roots. The emitters release a slow and steady drip of nutrient solution, which is absorbed by the roots of the plants.
- The plants are grown in a growing medium, such as perlite, vermiculite, or coconut coir. The growing medium holds the plant in place and helps to distribute the nutrient solution evenly around the roots.
- Excess nutrient solution drains from the growing containers and is returned to the reservoir. This ensures that the nutrient solution is not wasted and can be used again.
Advantages of Drip Irrigation Hydroponics
Drip irrigation hydroponics offers several advantages over traditional soil-based gardening and other hydroponic systems:
- Water efficiency. It uses water much more efficiently than soil-based gardening. Since the nutrient solution is delivered directly to the roots of the plants, there is very little water wastage, unlike traditional gardening where water may evaporate or run off. These makes drip irrigation hydroponics an ideal solution for regions with water scarcity.
- Precise nutrient delivery. The system ensures precise nutrient delivery to the plants. The solution is delivered in small, measured amounts directly to the roots, so each plant receives the exact amount of nutrients it needs. This leads to healthier and more productive plants.
- Faster growth and higher yields. With precise control over the nutrient delivery, plants can grow faster and produce higher yields in a hydroponic drip system compared to traditional soil-based gardening. The absence of soil-borne pests and diseases also results in healthier and more productive plants.
- Space efficiency. Hydroponic drip systems require less space than traditional gardening methods, as plants can be grown vertically, making them ideal for small gardens or indoor spaces.
- Reduced environmental impact. Drip irrigation hydroponics uses fewer pesticides and fertilizers, and generates less waste than traditional gardening. This makes it a more environmentally friendly option for growing plants.
 Orbit 69500 92-Piece Drip Irrigation Assortment Kit Parent (92-Piece Kit 20-Pack)
- 92-Piece set
- Installation guide included
- Refillable case
What are the Downsides of Drip Hydroponics System?
While drip hydroponics systems have many advantages, there are also some downsides to consider:
- Setting up and maintaining a drip hydroponics system can be more complicated and time-consuming than traditional soil-based gardening. The system requires a pump, tubes, and emitters, and may need regular adjustments to maintain the right nutrient balance.
- Drip emitters can become clogged, which can disrupt the nutrient flow and harm the plants. This can happen if the nutrient solution isn’t filtered properly, or if the emitters become coated with algae or mineral buildup.
- Hydroponic drip systems can be more expensive to set up than traditional gardening methods. The cost of pumps, tubing, emitters, and other equipment can add up, especially for larger systems.
- Power dependency. A drip hydroponics system requires electricity to power the pump that circulates the nutrient solution. This means that a power outage or pump failure can cause significant damage to the plants.
- Disease control. While hydroponics can reduce the incidence of soil-borne diseases, drip systems can still be susceptible to disease outbreaks. This can occur if the nutrient solution becomes contaminated with harmful bacteria or pathogens.
Types of Hydroponic Drip Systems
There are several types of hydroponic drip systems, each with their own unique characteristics and benefits.
Recovery
This is one of the most popular types of hydroponic drip systems. In a recovery drip system, the excess nutrient solution that is not absorbed by the plant is collected and recirculated back to the reservoir.
In my opinion, this makes the system very water-efficient, as it reduces wastage and ensures that the plants receive a constant supply of fresh nutrient solution. Recovery drip systems can be used with a variety of growing mediums, including perlite, vermiculite, and coconut coir.
Non-Recovery
In a non-recovery drip system, the excess nutrient solution that is not absorbed by the plant is not collected and is instead allowed to drain away. This type of system is simpler and easier to set up than a recovery drip system, as it does not require a separate container to collect and recirculate the nutrient solution. Non-recovery drip systems are often used with clay pellets or other inert growing mediums.
Top Feed Drip System
This is a type of hydroponic drip system that delivers nutrient solution directly to the growing medium, rather than to the plant roots. The nutrient solution is delivered through a drip emitter or spray nozzle that is positioned above the plants, which then filters through the growing medium to the roots. Top feed drip systems are often used with plants that require a lot of water, such as tomatoes and cucumbers.

Aeroponic Drip System
It is a type of hydroponic drip system that uses a misting nozzle to deliver nutrient solution directly to the plant roots. The roots are suspended in the air and are sprayed with a fine mist of nutrient solution, which ensures that they receive a constant supply of oxygen as well as water and nutrients. Aeroponic drip systems are often used with delicate plants such as lettuce and herbs.
Gravity Drip System
In a gravity drip system, the nutrient solution is delivered to the plants through a series of tubes that are arranged in a loop. The nutrient solution is pumped to the highest point in the loop, and then gravity is used to distribute the solution to the plants.
In my opinion, this makes the system simple and easy to set up, as it does not require a pump. Gravity drip systems are often used with smaller-scale hydroponic setups, such as home gardens and indoor systems.
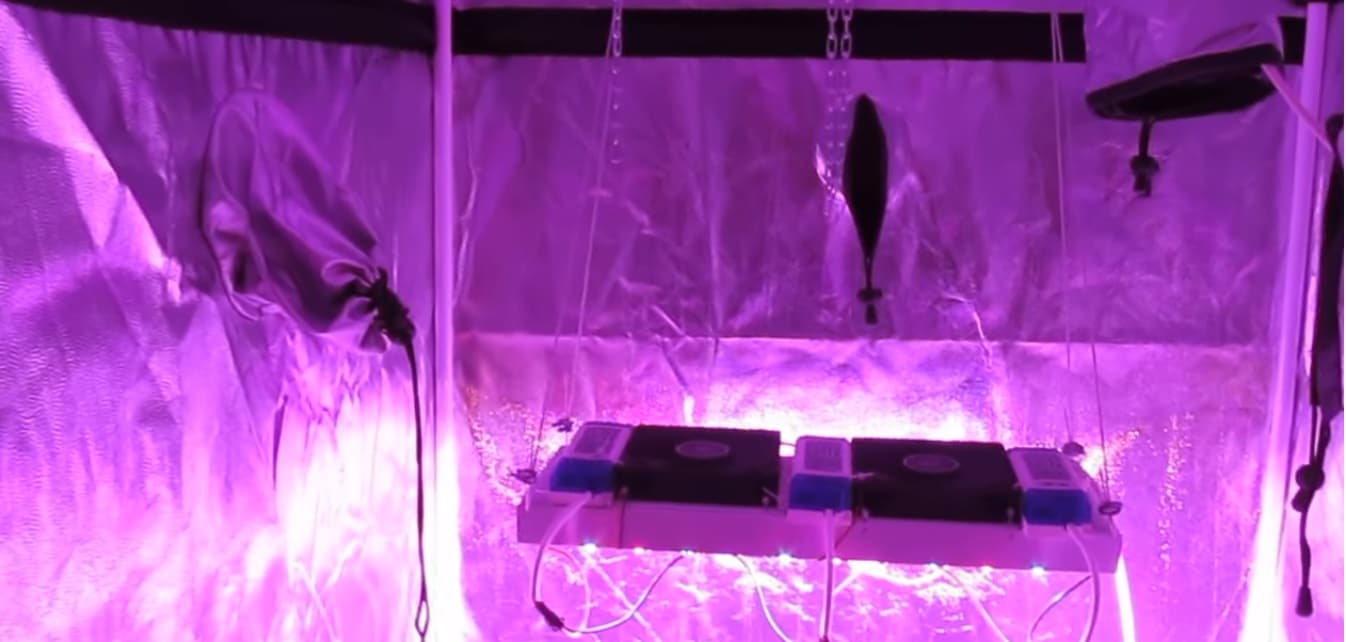
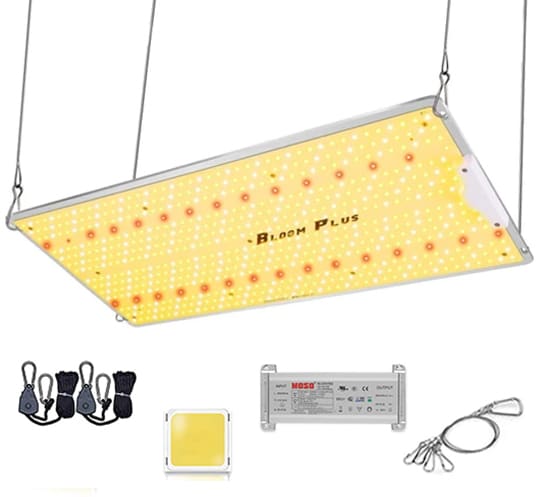 BLOOM PLUS LED Grow Lights, BP 2500W 2X4ft Coverage Grow Light Use with 646packs Samsung Diodes(Includes IR)
- For Indoor Hydroponic Plants Seeding Veg and Bloom
- Dimmable Sunlike Full Spectrum Plant Grow Lights
- 30-day money-back guarantee and a trusted 3 years warranty
What Plants Grow Best with a Drip System?
A hydroponic drip system is suitable for growing a variety of plants, including leafy greens, herbs, tomatoes, peppers, and strawberries. These plants have relatively low nutrient requirements and can thrive in a soil-less environment.
Hydroponic drip systems provide a steady supply of water and nutrients to the roots of the plants, which can lead to faster growth and higher yields. Leafy greens and herbs are easy to grow and a good option for beginners, while tomatoes, peppers, and strawberries can produce high yields in a small space.
Ultimately, the choice of plants to grow in a hydroponic drip system will depend on personal preferences, growing conditions, and gardening goals.
How to Install a DIY Drip Irrigation System?
Installing a DIY drip irrigation system can be an effective way to grow plants indoors or in small outdoor spaces. Here are the basic steps to follow:
Prepare The Growing Medium
The first step in setting up a hydroponic drip system is to prepare your growing medium. One of the best ratios for water retention and drainage is one part perlite, one part coconut coir or peat and one part vermiculite.

Be sure that this mixture is adequately hydrated with pure water. The coir or peat should be soaked overnight until everything is nice and wet before being placed into the containers you’ve designated. Remember to leave space in the container for when you plant the seedlings.
It is important to research soil pH levels because different types of plants require unique pH levels in order to thrive and grow properly. A mix of perlite, coco coir and vermiculite will give your plants an adequate balance of oxygenation, water absorption, and nutrients that are necessary for strong root growth which leads to healthy plants overall. Preparing this medium can be daunting, but it’s definitely worth it to have well-rounded soil that will result in a successful crop!
Prepare The Irrigation System
I think that, a well-prepared irrigation system can help ensure that your plants get the right amount of water and nutrition to thrive. When preparing an irrigation system, make sure to use the right size tubing for your plants. Spaghetti tubing can work for small rigs with a few containers, though drip emitters are more reliable and provide a more consistent flow.
To finish off your tube, you should either seal it with silicone sealant or crimp and secure it with a zip tie. For larger rigs with multiple rows of plants, you should use a drip manifold instead of spaghetti tubing to make sure each row gets adequate coverage.
It’s also worth running a central tube with a larger diameter to the manifold for extra reliability and efficiency. After everything is connected up, test out the system to check that it’s performing properly before starting to grow your plants.
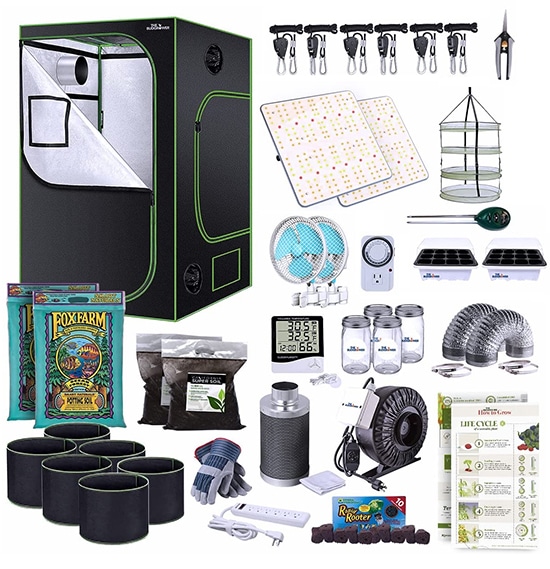 TheBudGrower Complete All-in-One Home Grow Solution 4x4x7ft- 2200W(2)
- LED lights specialty manufactured by VIVOSUN with Samsung LM301 diodes for FULL spectrum light
- The industries most durable grow tent – heavy duty 1680d oxford cloth
- Money & energy saving complete home grow tent kit
Prepare the Tank
I think that, to get started, find a large plastic tote with recessed wells in its lid. This is perfect for creating a small grow tray that can be conveniently positioned at an angle, allowing runoff to flow back into the reservoir.
Next, you’ll need to cut drainage holes into the lid of the tote so that water can run out easily. Make sure you also include some space in between these holes to leave room for cords and tubes. After this is complete, you can begin setting up your hydroponic system and experiment with growing whatever interests you!
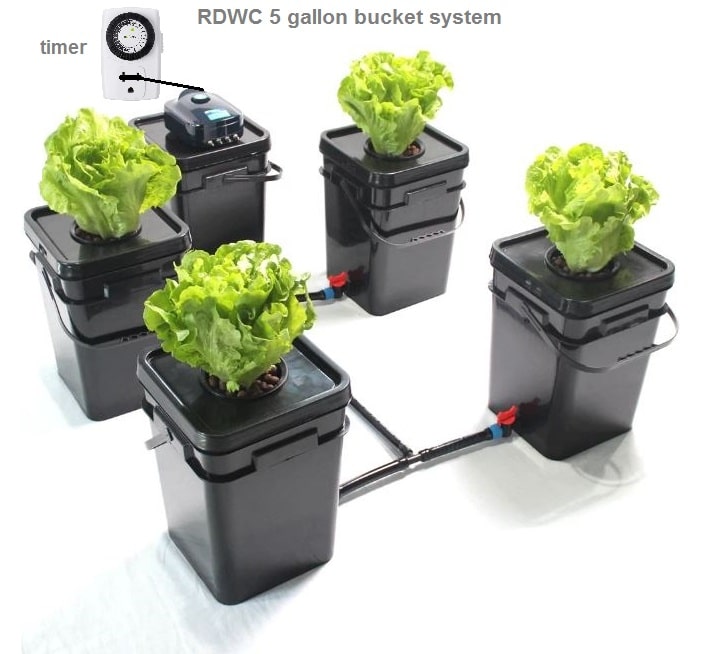
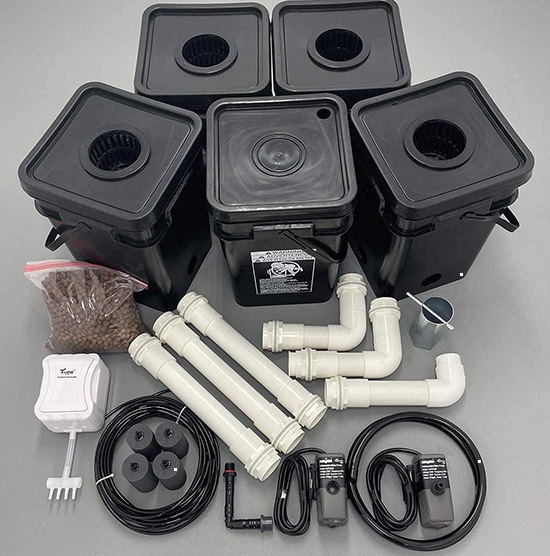 Recirculating Deep Water Culture (RDWC) Hydroponic Grow Kit System
- Reservoir Bucket Connected to 4 Grow Buckets
- 400 Gallon/hour Circulating Pump
- Large 5 gallon square buckets, pre-drilled
Check Your System
The fourth step in creating a hydroponic system is to check the system. This includes filling the tank with pure water, adding an air stone and pump, and connecting the pump to the tubes.
From my experience, the timer should be programmed according to the user’s desired watering interval so that it can start its first cycle. Once all of this has been done and double-checked, it is time to turn on the system. Then you can observe as pure water flows from the heads of the hydroponic system according to your set interval before cutting off after some amount of time.
You would ideally want to watch one complete irrigation cycle in order to assure that everything is functioning properly. Pay extra attention to items such as flow rate and pressure from each head or spray nozzle. These are important because if either are too high or too low, then there could be potential problems for the plants later down the line when using this particular system for growing.

Having proper pressure and flow rate also allows for a more even distribution of water in case you have multiple beds being flooded at once through your system. Everything should look satisfactory in regard to your created timer settings before continuing onward with planting your vegetation inside your hydroponic nursery environment.
Prepare a Nutrient Solution
Before adding the solution to the reservoir tank, it’s necessary to ensure that the pH level and EC are appropriate for your chosen crop. Testing kits are available which can help you establish the correct levels. Depending on your set-up, we recommend perfecting the solution in another container prior to adding it to the reservoir tank to avoid a potentially catastrophic mess if you make a mistake!
Mixing of the nutrient solution is relatively simple. All nutrients needed should be combined into one vessel and stirred until you achieve even distribution throughout – this helps create a consistent approach for plant growth. Once thoroughly mixed, add it to the reservoir tank using a slow pouring motion.
From my experience, to guarantee homogeneity throughout, I suggest stirring for around 3 minutes after adding all ingredients. This will guarantee that all plants will receive equal amounts of essential nutrients when grown in a hydroponic environment.
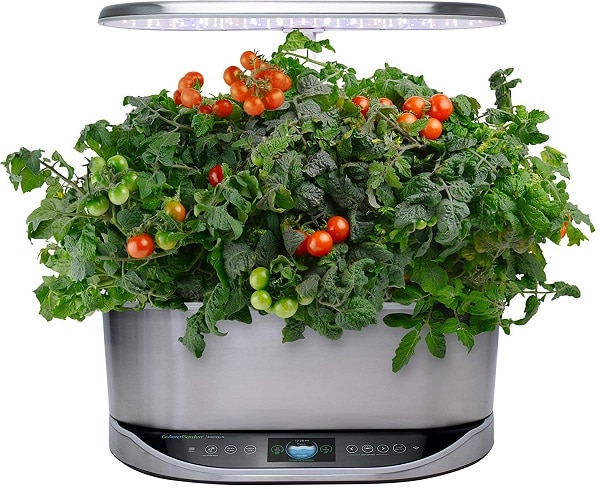
 AeroGarden Bounty Elite - Indoor Garden with LED Grow Light
- WiFi and Alexa Compatible, Stainless Steel Grow up to 9 plants, up to 24duim
- Includes everything you need to grow
- 50 watt LED Grow Lights, perfect spectrum for fast growth & big harvests
Add Your Seedlings
Gently set each seedling in the potting soil with care, making sure to leave enough space for root growth and expansion. Place the emitter heads close to the roots of each seedling, so they are able to receive an optimal amount of light that is important for photosynthesis. Our article Hydroponics Lights.
The distance between them should be close enough that they are not too far away from the upper parts of your seedlings, but also not too close that you burn them. Keep a watchful eye on your plant’s progress and if necessary, adjust their positions.
Once you have your emitter heads in place, make sure that you water your seedlings until completely moistened. You may need to keep checking regularly over time for adequate moisture levels, as some plants may require more frequent watering than others. Adjustment of your watering routine will depend on the size of your pots and the type of medium used, so be sure to research these aspects before getting started!
Lastly, give your plants a nutrient boost by using a fertilizer specifically formulated for young plants or those just beginning their growth stages. This will help ensure that all of your effort does not go wasted, and you can look forward to plentiful yields ahead!
Activate Your System
After carefully assembling the pieces and plugging in grow lights if needed, users need to monitor their environment closely for the first few cycles. This helps them ensure that everything is working properly and programmed as intended.
Once all components are running as they should and calibrated correctly, very minimal supervision is required while the system will run on its own. The user needs to occasionally check EC and pH levels of the nutrient solution, as well as regularly cleaning it out to maintain proper growing conditions.

Once the timer has been programmed correctly to deliver water and nutrients to their plants at regular intervals, they can sit back and watch their crops get all they need with minimal input from them.
From my experience, provided that the source of water doesn’t run out, their garden will be able to feed itself indefinitely, leaving more time for users to attend to other matters without worrying about extra maintenance for their system. I recommend my article you can easier activate your system after reading it – Hydroponics Lights,
BONUS: How To Maintain a Hydroponic Drip System?
Maintaining a hydroponic drip system is essential to ensure that your plants grow healthy and productive. Here are some steps you can take to maintain your system:
- Monitor pH levels. Regularly check the pH level of the nutrient solution in your tank using a pH meter. The optimal pH range for most plants is between 5.5 and 6.5. Adjust the pH level using pH up or pH down solution as needed.
 PH Meter, Digital PH Meter 0.01 PH High Accuracy Water Quality Teste
- 0-14 PH Measurement Range
- For Hydroponic and Household Drinking
- For Pool and Aquarium Water
- Check nutrient levels. Regularly check the nutrient levels in your tank to ensure that your plants are receiving the correct balance of nutrients. Follow the instructions on the nutrient solution package to adjust the nutrient levels as needed.
- Clean the system. Clean the tubes and emitters in your system regularly to prevent clogging and ensure proper nutrient delivery. Use a solution of water and hydrogen peroxide to clean the system.
- Check for pests and diseases. Monitor your plants regularly for signs of pests or diseases, such as yellowing leaves or discoloration. Use organic pest control methods to prevent and treat infestations.
- Maintain temperature and humidity. Maintain a stable temperature and humidity level in your growing area to ensure optimal plant growth. Most plants grow best at temperatures between 65- and 80-degrees Fahrenheit and a humidity level between 40 and 60%.
- Prune and harvest regularly. Regularly prune your plants to promote healthy growth and prevent overcrowding. Harvest your plants when they are ready, which will vary depending on the type of plant.
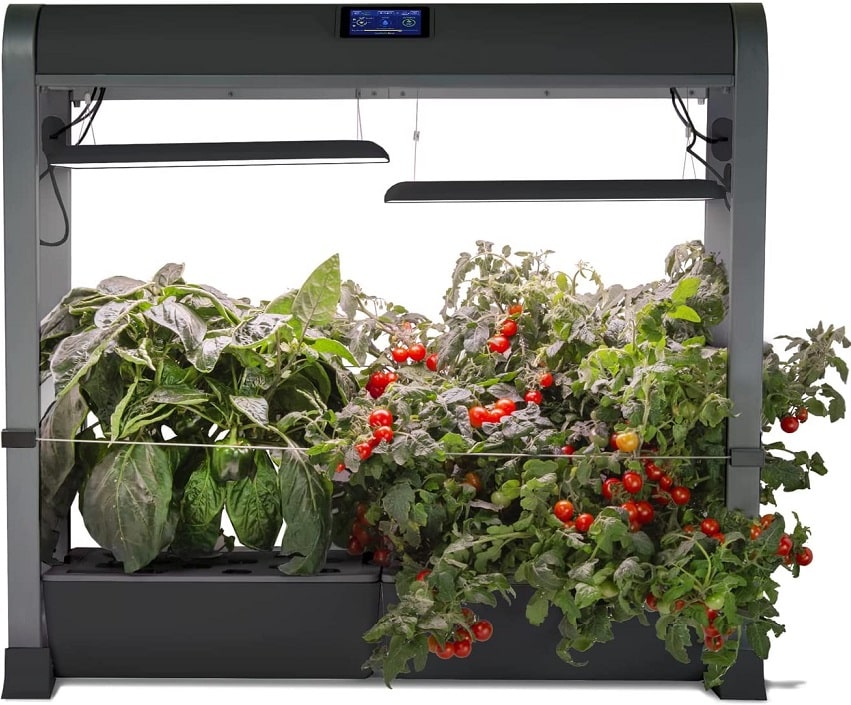
 AeroGarden Farm 24Plus with Salad Bar Seed Pod Kit - Indoor Garden with LED Grow Light, Black
- Indoor Garden with LED Grow Light, Black, Automatic timer makes sure the lights go on and off
- Adjustable grow height of 24Inch, and can be stacked with other Farm gardens
- Includes two Salad Bar Seed Pod Kits, featuring 9 lettuce pods, 3 herb pods, and 12 tomato pods
Tips For Using a Drip Irrigation System
- Use the appropriate emitters for your plants and growing medium. Consider factors such as flow rate and spacing to ensure that your plants receive the right amount of water and nutrients.
- Use a water filter to remove impurities and sediment from your water supply. This can help to prevent clogging and buildup in your system, while also ensuring that your plants receive clean, healthy water.
- Inspect your system regularly to check for leaks, clogs, or other issues. Make any necessary repairs or adjustments as soon as possible to prevent damage to your plants.
- Consider the time of day and weather conditions when setting your watering schedule. Water your plants during the cooler parts of the day to prevent evaporation and reduce stress on your plants.
- Apply a layer of mulch around your plants to help retain moisture and prevent evaporation. This can help to reduce the amount of water your plants need, while also protecting the roots from excessive heat.
- Regularly check your system for leaks or other issues that could result in water waste or damage to your plants. Fix any leaks or clogs as soon as possible to prevent further damage.
- In my opinion, our article can help Hydroponics Lights.
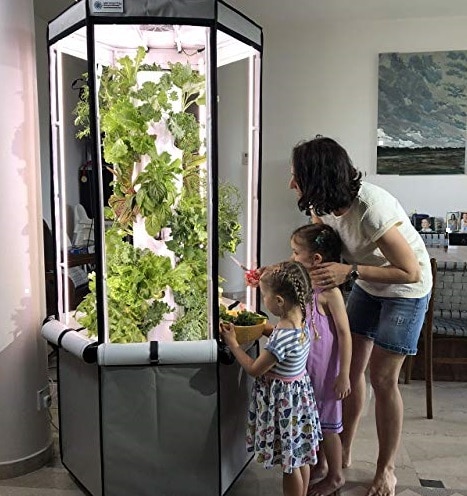
 Aerospring 27-Plant Vertical Hydroponics Indoor Growing System
- Easy to use aeroponic system for your home
- Fan - Grow Lettuce, Herbs, Veggies & Fruits
- Grow smart & eat healthy, 20 gallon water reservoir Grow Tent, LED Grow Lights
FAQ
Is a drip system expensive to set up?
The cost of setting up a hydroponic drip system can vary depending on the size of the system and the materials used. However, it can be an affordable option for those who want to grow plants in a small space. You can also build your own system using materials such as PVC pipes and buckets, which can be cost-effective.
How often should I water my plants with a hydroponic drip system?
The frequency of watering will depend on the type of plants you are growing, the stage of growth, and the environmental conditions. Generally, most plants require watering once or twice per day, but this can vary depending on the size of the plants, the temperature and humidity, and the flow rate of your emitters.
How do I prevent clogging in my hydroponic drip system?
Clogging can occur in the tubes and emitters of your system if sediment or other debris is present in the water. To prevent clogging, use filtered water and clean your system regularly. You can also use emitters with larger orifices, or install a filter or mesh screen in the system to prevent debris from entering the tubing.
What is the best growing medium for a drip irrigation system?
The choice of growing medium for a hydroponic drip system will depend on the specific needs of your plants and the setup of your system. However, some common options include perlite, vermiculite, coconut coir, and rockwool.
Perlite and vermiculite are lightweight and can provide good aeration and drainage for plant roots. Coconut coir is a sustainable option that retains moisture well, while rockwool is a sterile and porous medium that can provide good support for plant growth.
How deep should the drip system be?
The depth of your drip system will depend on the size of your plants and the growing medium you are using. As a general rule, the emitters should be positioned just above the surface of the growing medium to ensure that the roots receive sufficient water and nutrients.
For smaller plants, such as herbs and lettuce, the emitters may only need to be a few inches deep. For larger plants, such as tomatoes and peppers, the emitters may need to be deeper to ensure that the roots have adequate access to water and nutrients. Be sure to follow the recommendations for your specific plants and growing medium.
Leave a Reply