• Skip to primary navigation
  • Skip to main content

Hydroponics Garden Geek

My Hydroponics Garden Blog - hydrogardengeek

  • Shop
    • Best Aeroponic Tower Garden
    • Best Grow Tent Kits
    • Best Indoor Vertical Garden
    • Best Aeroponics Systems
    • Best Hydroponic Tower in 2022
    • Best Hydroponic Bucket System
    • Best Hydroponics NFT System
    • Best Clay Pebbles
    • Best Grow Bags
    • Best Mushroom Grow Bags
    • Aerogarden review aerogarden harvest indoor hydroponic system
  • Search
  • Privacy Policy
You are here: Home / Archives for Hydroponics growing / Indoor gardening

Indoor Gardening using hydroponics

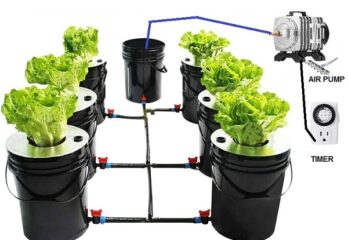
21 RDWC 5 Gallon bucket system scheme whith air pump and timer anf example plants in 6 plant buckets and 1 only nutrient bucket

How To Build A Recirculating Deep Water Culture System?

Hydroponic gardening has been growing in popularity among home gardeners and small-scale farmers due to several key benefits. By delivering nutrient-rich solution directly to plant roots rather than soil, hydroponics ...
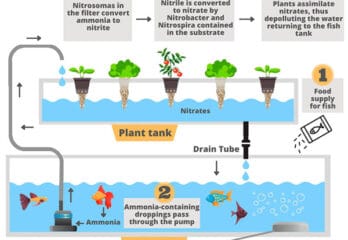
detailed diagram of the aquaponics system with description

What Is the Aquaponics System?

Aquaponics presents an innovative method of food production integrating aquaculture fish farming with soilless plant cultivation in a sustainable closed-loop ecosystem. This symbiotic pairing enables fish and plants to thrive ...
Dutch Bucket System

Dutch Bucket Hydroponic System

Hydroponic gardening has been gaining popularity among home gardeners and small-scale farmers in recent years. One particularly effective type of hydroponic system is the Dutch bucket system. In this simple ...
2 vertical hydroponic plant wall systems how to grow plants without soil 2

What is Vertical Herb Garden?

A vertical herb garden is an innovative way to grow herbs, vegetables, flowers, and other plants in a compact vertical space rather than a horizontal garden plot. As urban living ...
Ebb & Flow (Flood and Drain) Hydroponic System

Ebb & Flow (Flood and Drain) Hydroponic System

Hydroponics is the method of growing plants without soil, using mineral nutrient solutions in water. One of the most popular hydroponic systems used by home growers and commercial operations is ...
-dwc-deep-water-culture-or-bubbleponics

What is Bubbleponics?

Bubbleponics is an innovative and efficient way to grow plants that combines hydroponics and aquaculture. This sustainable farming technique utilizes nutrient-rich water from fish tanks to feed plants without soil ...
Hydroponic Drip System Recovery schema with two reservoirs with water

Hydroponic Drip Systems: What is It & How to Set Up? – Tutorial
Hydroponic drip systems are a popular and efficient way of growing plants in a soil-less environment. These systems use water, nutrients, and a growing medium to nourish plants and promote ...
How To Build A 5 Gallon Hydroponic Bucket4

How to Build 5 Gallon Bucket Hydroponic System – Tutorial
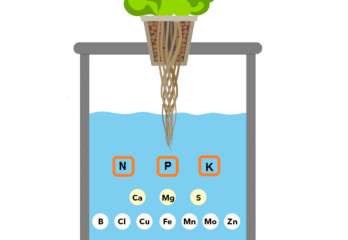
One of the simplest and most cost-effective hydroponic systems for beginners is the 5-gallon bucket hydroponic system. With just a few inexpensive supplies and some basic knowledge, anyone can build ...
nutrient solution for hydroponic systems

Best Hydroponic Nutrients 2023: Complete Buyer’s Guide
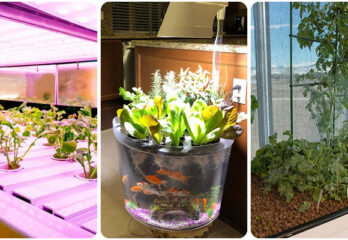
One of the most critical components of any hydroponic system is the nutrient solution, which provides the essential elements that plants need to thrive. With the ever-increasing popularity of hydroponics, ...
Indoor Aquaponics System Basics, Plants, Lighting, Kits3

Indoor Fish Tank Aquaponics System Complete Guide
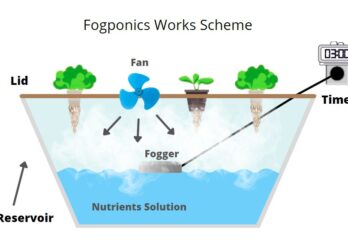
One of the most popular ways to practice aquaponics is by using an indoor fish tank aquaponics system. This system is ideal for urban areas where space is limited, and ...
-dwc-deep-water-culture-or-bubbleponics

What is Deep Water Culture (DWC system) – Tutorial
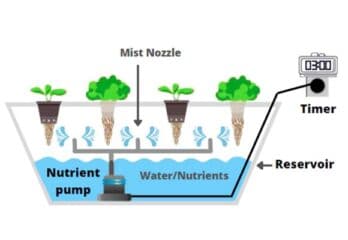
If you're new to hydroponics and unfamiliar with terms like deep water culture, don't worry, it's simpler than it sounds! DWC is a hydroponic growing method that involves suspending plant ...
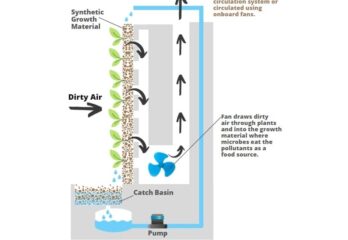
aeroponics hydroponics system shema

What is Aeroponics | A Tutorial

If you're new to gardening or looking to expand your skills, you may come across unfamiliar terms, such as aeroponics. Essentially, aeroponics is a method of plant cultivation that does ...

How To Build A Recirculating Deep Water Culture System?

Roger Peters by Roger Peters | Last Updated: January 17, 2024 Leave a Comment

Hydroponic gardening has been growing in popularity among home gardeners and small-scale farmers due to several key benefits. By delivering nutrient-rich solution directly to plant roots rather than soil, hydroponics allows for faster growth times, higher yields in smaller spaces, and easier control of nutrients compared to traditional in-ground cultivation.

One increasingly utilized hydro technique is the recirculating deep water culture system (RDWC). This method involves suspending plants in net pots over channels of aerated, nutrient-rich water that continuously recirculates via electric water pump from a reservoir.

Constructing even a modest RDWC setup can sustainably grow various vegetables and herbs with much higher yields per square foot compared to soil, benefitting the self-sufficient gardener. This article provides detailed guidance on designing and installing a fully-functioning recirculating deep water culture hydroponic system at home for optimal plant growth and health.

What is an RDWC System?

A recirculating deep water culture (RDWC) system is a subtype of the broader hydroponic gardening methodology, which involves growing plants in nutrient-rich water rather than soil. RDWC uses a flooded, oxygenated reservoir that continuously circulates solution to multiple planting beds or tubes via electric water pump. It’s considered a “constant flow” technique.

The oxygenation provided by air stones combined with the recurring flow of aerated water enables rapid growth rates and higher yields compared to other hydro methods. The continual circulation safeguards against problems like stagnation and lack of oxygen. It also allows for easy application of nutrients across all plant sites.

2 RDWC 5 Gallon bucket system scheme whith air pump and timer anf example plants in 6 plant buckets and 1 only nutrient bucket

Img: Recirculating Deep Water Culture System Schema

In RDWC, net pots containing seedlings sit suspended above channels of recirculating water, generally about 3–8 inches deep. An inert medium like expanded clay pellets surrounds roots emerging through pots, while the remainder stays submerged. Plants in this system get 100% of nutrients and moisture requirements directly from the perpetually circulating, aerated solution.

Home RDWC systems allow indoor gardening in limited spaces year-round. They commonly utilize materials like plastic containers, PVC piping, water pumps and air stones that are affordable and easy to configure into a productive system. Once running, RDWC requires monitoring and replenishing of the central nutrient reservoir about once a week on average. This recurring deep water culture technique is emerging as a preferred hydroponic approach for home use.

How Does Recirculating DWC Systems Work?

A recirculating deep water culture system relies on the interaction between several components to function successfully. It begins with an electric water pump submerged in a central reservoir filled with nutrient solution. Tubing connects the pump outlet to raised grow channels that house the plant roots suspended in net pots. Additional tubing then returns solution from the channels back down to the reservoir in a closed loop flow.

Air stones connected to an air pump are placed in both the central reservoir and grow channels to infuse dissolved oxygen throughout the system. This oxygenation energizes root development and plant growth. The recurring circulation of aerated water also prevents stagnation, which reduces risks of root rot.

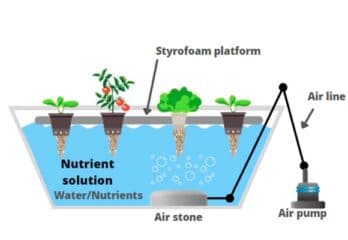
hydroponic Deep Water Culture or Bubbleponics schema with air stone inside a reservoir with water and nutrients with air pump too

Img: Deep Water Culture System Schema

The pump circulates solution from the reservoir up to the raised grow channels in a timed flood and drain sequence, generally 15 minutes on and 45 minutes off. So plant roots get bathing in nutrient solution then time to breathe air before the next flood cycle.

This continual recirculation equalizes pH, nutrients, and temperature for all plants regardless of location. The system maintains optimal growing conditions with little effort once dialed in and running smoothly. Monitoring nutrient levels, pH, electrical equipment, and refilling the reservoir is essentially the only routine maintenance required in a home RDWC system between harvests.

RDWC 5 Gallon bucket system scheme whith air pump and timer anf example plants in 4 plant buckets and 1 only nutrient bucket

Recirculating Deep Water Culture (RDWC) Hydroponic Grow Kit System Recirculating Deep Water Culture (RDWC) Hydroponic Grow Kit System
  • Reservoir Bucket Connected to 4 Grow Buckets
  • 400 Gallon/hour Circulating Pump
  • Large 5 gallon square buckets, pre-drilled
Check Price
If you click this link and make a purchase, we earn a commission at no additional cost to you.

Comparing RDWC and DWC Hydroponic Systems

Recirculating deep water culture (RDWC) and standard deep water culture (DWC) systems share some fundamental similarities in their approach to hydroponic gardening, but also have distinct differences.

Both utilize air stones connected to growing containers in order to oxygenate the nutrient solution. They both also position plants in inert grow media above reservoirs that submerge part of the roots while allowing upper parts to emerge. This oxygen to root zones while providing full nutrition and moisture requirements for vigorous growth.

The key difference lies in the continuous flow and return of nutrient solution from a central reservoir in RDWC systems, compared to the generally static nature of individual DWC containers.

In RDWC, an electric pump perpetually circulates the central, aerated reservoir solution throughout all growing tubes in a closed loop. This recurring flow equalizes conditions, prevents stagnation issues, and enables larger scale systems. The stationary solution in basic DWC requires more overall monitoring and individual attention per site.

Component RDWC DWC
Water Flow Continuous closed-loop recirculation via electric pump Static individual containers
Scale Potential Expandable, supports numerous grow sites Limited number of individual sites
Central Reservoir Maintains centralized solution No common reservoir
Maintenance Needs Less overall effort once running Greater individual container oversight
Stagnation Risk Lower from perpetual flow Higher in static solution

RDWC provides excellent aeration, reduced stagnation tendencies, and scalability compared to standard deep water culture systems. Both can produce robust hydroponic plants, but RDWC is emerging as the preferred technique.

Advantages Of A Recirculating Deep Water Culture System

Utilizing a continuously circulating nutrient reservoir provides RDWC systems with distinct benefits over other forms of hydroponic cultivation. The major advantages of operating a recirculating deep water culture system include:

  • Increased Oxygenation and Healthier Roots. The perpetual motion of water over air stones dissolves and distributes more oxygen throughout the system, stimulating stronger, healthier root zone development. Roots thrive submerged in the highly oxygenated solution.
  • Reduced Risk of Root Disease. The recurring circulation from a common, aerated reservoir flows fresh nutrient solution to all plant sites while diluting any potential localized issues. This continual motion and oxygenation significantly lowers the chances of root zone problems taking hold compared to stagnant hydro systems or individual containers where water and/or oxygen can be cut off, enabling pathogenic bacteria or fungi to rapidly infect entire root structures. RDWC’s perpetual flow and air infusion keeps roots vigorous.
  • Uniform Growing Conditions and Growth. Drawing complete nutrient and water requirements from one shared central reservoir maintains consistent parameters like nutrient concentrations, pH levels, water temperature and dissolved oxygen throughout the entire system. As such, plants generally grow at a uniform, even pace across the RDWC garden with more limited issues of lagging or struggling vegetation since the perpetual solution equilibrates everything automatically.
  • Greater Efficiency and Density in Limited Spaces. The optimized oxygenation and disease resistance allows RDWC systems to support a higher overall plant density compared to soil plots and many other hydro techniques. By maximizing yield-per-square-foot, home gardeners can sustainably grow more vegetables and herbs even in indoor spaces with lighting systems.
  • Ability to Operate Effectively with Minimal Oversight. The closed-loop flow and centralized reservoir of RDWC allows for automated circulation and periodic nutrient dosing adjustments to the singular holding tank. This means that once all equipment is confirmed functional with safety checks in place, the system can essentially run itself for days if not weeks before needing monitor checks. Grow lights and air flow would still require periodic inspection, as with any indoor garden.

Leveraging a perpetually recirculating central nutrient solution to bathe roots enables improved plant health, standardization, scalability and efficiency in home hydroponic cultivation.

Drawbacks of a Recirculating Deep Water Culture System

While having considerable advantages, utilizing a recirculating hydroponic system also comes with some potential downsides to consider:

  1. Higher Initial Equipment and Setup Costs. Constructing an RDWC system with all required components like tubing, water pump, timers, reservoir containers, and other accessories can run anywhere from $300 up to even $2,000+ for more extensive builds. This represents a notable upfront investment compared to basic hydroponic methods that utilize more affordable individual containers and minimal specialized equipment.
  2. More Intensive Maintenance When Issues Arise. Due to the interconnected nature of RDWC systems, problems like pump failures, timer malfunctions or leaks can impact other components and require more complex troubleshooting and replacement procedures compared to diagnosing a standalone DWC container system. Resolving breakdowns often necessitates at least some disassembly to access equipment.
  3. Increased Risk from Centralized Failures. With full dependence on a single central reservoir, issues like water pump defects, power outages affecting the pump or timers, rapid pH fluctuations, or accidental contamination of reservoir solution poses larger scale risks in RDWC systems since the deficiency or damage impacts all connected grow sites simultaneously. Other hydro techniques based around individual containers have less expansive correlations.
  4. Limitations for Expanding Scale. While RDWC systems provide excellent efficiency for larger home installations, they can reach limitations if trying to perpetually expand the number of grow sites supported off a given reservoir volume and fixed pump circulation capacity. Either necessitates adding a second standalone system or upgrading pump strength and reservoir scale.
  5. Need for Diligent Safety Practices. When handling water, electricity, and drainage aspects, RDWC builders must exercise diligence around leak points, avoiding pump/element contact with solution, positioning electrical hardware properly to avoid sparks or exposure, and routing excess drainage from potential early leaks safely. Failure to separate high voltage aspects from water circulation risks electrocution hazards. Proactive safety is essential.

How To Set Up a Recirculating DWC System?

Constructing a properly functioning recirculating deep water culture hydroponic system involves integrating various components into a closed-loop flow system. The main pieces of equipment needed to include pump(s), tubing, timers, growing containers, a reservoir, air stones, waterproof lighting (for indoor systems) and other accessories fitting for the desired scale. Configuring the layout and equipment for smooth recirculation while optimizing plant spacing takes some planning and handy skills.

Assemble The Reservoir

Obtain a plastic container or bucket large enough to hold the full volume of nutrient solution needed for your system. The reservoir should be opaque or painted black to prevent light getting in and promoting algae growth.

Set up the water pump inside the reservoir. Use tubing to run from the pump outlet up to the grow site and back into the reservoir in a closed loop. Install an air stone connected to an air pump in the reservoir to oxygenate the nutrients. Oxygen is critical for healthy roots.

Prepare Containers

Acquire polystyrene or plastic grow buckets, pots, or tubs with drainage holes for each plant. Cut small slits near the top to hold plants in place. Fill the containers with a medium like perlite, vermiculite or clay pebbles to support the plant roots.

Alternatively, get a ready-made raft system with slots for plants built into foam boards that float on the nutrient solution. Position larger plants towards one end to prevent overshadowing.

Put Plants Into System

Gently place pre-grown seedlings or stem cuttings with established roots through the openings, so the root mass hangs beneath the container into the empty space where water will flow. The roots immediately get constant moisture but also lots of oxygen.

Turn on pumps once plants are anchored in place to start circulating the water and nutrients. Monitor the system closely at first to ensure proper flow rates and fill levels before leaving to run automatically. Maintain consistent conditions and perform weekly maintenance for optimal growth.

Preparing The Nutrient Solution

First, research what nutrients your chosen plants need and find a complete hydroponic nutrient formula suitable for your crop. Many premixed solutions are available to simplify this step. Be sure to get one specifically designed for the vegetative and flowering phases.

Next, you’ll need to mix up batches of nutrient solution to flow into your reservoir according to the directions on the bottle. Carefully measure and add each individual element. It’s crucial to get the strength right, or you risk burning your plants with too much fertilizer. Use pH strips to balance the solution between 5.5 and 6.5.

Optimizing Lighting

Start by determining how much light your plants need. Leafy greens and herbs do well with moderate light, while fruiting plants like tomatoes require very high intensity discharge (HID) grow lights. LED grow lights are energy efficient, long-lasting, and available in full spectrum formulations.

Position the grow lights to maximize coverage over the plant canopy. Raise lights higher to cover more plants, or lower to increase light intensity. Use a light meter to check that plants are receiving adequate intensity at the canopy level without overheating the leaves. Adjust as the plants grow taller.

Maintain Optimal pH Balance

Test and record the pH of the nutrient solution daily using test strips or a digital pH monitor. Recirculating hydro systems tend to drift downwards as plants absorb nutrients. Use pH up solution to bring the reservoir back up to the target range if needed.

Additionally, check EC (electrical conductivity) to monitor overall nutrient levels. As plants uptake fertilizer, EC declines. Top up the reservoir with a new batch of nutrients when depletion gets too low. This will maintain nutrient availability and prevent deficiencies.

Common Issues with A Recirculating DWC

While recirculating deep water culture hydroponics provides ideal moisture and nutrient levels for thriving plants, these systems do come with certain maintenance requirements and potential pitfalls.

Managing factors like water quality, equipment functionality, and pathogen control is key to avoiding preventable issues. The following overview covers areas to monitor and troubleshoot when operating a home recirculating DWC setup for best results:

  • Waterborne Illnesses. Hydroponic systems carry a risk of spreading certain waterborne illnesses between plants that share the same nutrient reservoir. Root rot diseases like pythium are common and can quickly kill seedlings. Always thoroughly sterilize equipment between crops and check roots for brown, slimy lesions. Replace reservoirs frequently and use beneficial microbes to outcompete pathogens.
  • Limited Plant Selection. While most plants can grow hydroponically, some species are better DWC candidates. Stick with quick maturing greens and vegetables over long season fruiting crops. Focus on leafy lettuces, herbs, spinach, bok choy, peppers, or tomatoes as plants that perform well. Avoid large vines or heavy squash. Start more plants on a staggered schedule for continual harvests.
  • Power Outage. A compromised water pump combined with depleted oxygen levels during an electrical outage can rapidly suffocate plant roots and facilitate disease. Get a battery-powered air pump and air stone to sustain oxygenation for at least 12 hours without power. Have a generator or solar panels as backup to restart systems quickly before irreversible damage occurs.
  • Water Quality. Tap water containing chlorine or chloramines is toxic to plants. Always start with clean, non-chemically treated water that’s been dechlorinated. Hard water high in minerals causes nutrient lockup issues over time. Either filter water or use distilled. Optimizing water quality prevents many problems in recirculating hydroponics. Test EC and pH routinely.
  • Pathogen Growth. Stagnant or unaerated water provides prime conditions for bacterial and fungal pathogen growth. Pseudomonas, pythium, and phytophthora species can rapidly infect vulnerable root systems submerged in contaminated reservoir water, spreading quickly between plants that share recirculating nutrient solution.
  • Clogged Pipes. Mineral sediment from hard water or tap water chemicals can accumulate inside pump mechanisms and small irrigation lines. Slow flow or complete line blockages inhibit water circulation. This starves roots of nutrients and oxygen. Routinely flush pipes and replace pump impellers if flow seems restricted.
  • Algae Growth. Photosynthetic algae thrive on plant-produced compounds in nutrient rich water. Algae compete with crops for nutrients and block light. Prevent with opaque reservoirs and no light penetration inside pipework. Remove algal growths manually and treat reservoirs with hydrogen peroxide to regenerate clean water.

Keeping DWC systems clean to limit pathogen issues is key, as is proper preventative maintenance on water pumps and lines for uninterrupted circulation. Also be vigilant against green algal growth getting established through good system hygiene and water treatment practices.

Which Plants Can I Grow Using RDWC?

Recirculating deep water culture hydroponic systems provide ideal growing conditions for a wide variety of quick-maturing, high-yield plants. By continually bathing roots in oxygenated nutrient solution, RDWC allows nearly unlimited growth potential not restricted by soil.

The following list covers superb plant candidates that flourish using recirculating hydroponics:

  • Leafy Greens. Lettuce, spinach, kale, arugula, and all types of Asian greens thrive under these optimal hydroponic conditions. Their growth rate and yields accelerate greatly compared to soil methods. RDWC leafy greens also maintain tenderness and flavor longer before bolting.
  • Basil, mint, oregano, thyme, sage, parsley and cilantro all utilize flowing DWC solution to maximize production of flavorful leaves and cuttings. The extensive root systems stretch freely in protected channels. RDWC herbs yield higher than soil, too.
  • Tomatoes, peppers, beans, peas, cucumbers, zucchini and vining crops are highly productive with their roots constantly submerged. Trellising helps stabilize fruiting plants. The clean, protected reservoir prevents soil-borne disease. RDWC is perfect for getting the most from vegetable plants.
  • Produce sweet, abundant fruit all season using DWC methods. Column towers with vertical stacking make great use of space. Ever-bearing varieties fruit perpetually with ideal growing parameters. The constantly moist root zone prevents dry periods. RDWC is ideal for getting the highest strawberry yields.
  • Microgreens and shoots. Grow rapidly with constant moisture for frequent cut-and-come-again harvesting potential. Shoots and baby seedlings always have optimal hydration and nutrients in RDWC systems. Grow nutrient-dense salad mixes this way.
  • Some root crops. Radishes, turnips and watercress actually perform well in DWC instead of aeroponics. Bucket systems allow swelling edible roots to fully submerge while growing suspended hydroponically overall.

FAQ

What temperature should I maintain for nutrient solutions?

Ideal nutrient water temperatures for hydroponic systems range between 68°F - 77°F to balance plant growth rates and disease prevention. Cooler temperatures below 65°F will slow transpiration, nutrition uptake, and overall plant development. However, hot reservoirs over 80°F put root systems at high risk for pathogenic fungal or bacterial illnesses taking hold. Use aquatic heaters and chillers as needed to help maintain consistent temperatures.

What is the recommended frequency for changing nutrient solution?

For a home deep water culture hydroponics system, plan to fully drain, clean and refresh nutrient reservoirs every 2–3 weeks through peak growing seasons, extending to every 4 weeks maximum through winter months. Seedlings, young plants, and times of rapid flowering or fruiting have the highest nutritional demands, so the most frequent solution replacements.

What are the oxygen level requirements for RDWC?

Maintain dissolved oxygen concentrations of at least 6–8 parts per million tested at the root zone level for healthy hydroponic plants. Air pumps connected to water bubbling stones are critical for sufficient oxygenation in standing water systems. Generate the smallest micro bubbles possible to increase surface contact and maximize O2 saturation recirculating around root structures.

How deep should roots extend into the water?

Aim to have individual plant roots suspended 4–8 inches below net pots into free space open to nutrient solution circulation. Too shallow risks drying out thin bottom layers, or density prevents free flow. Overly deep root tendrils increase chances of hypoxia and pathogens taking hold. Find the right balance for each species and system.

Is an air pump necessary for a recirculating deep water culture system?

Yes, an air pump with an air stone is absolutely essential for proper oxygenation of the nutrient reservoir. The bubbles provide oxygen to prevent hypoxia and allow healthy roots to form.

What pump flow rate (gallons per hour) is optimal for RDWC?

Aim for a flow rate of at least 120 gallons per hour (GPH) for a home RDWC system, though commercial systems use up to 300 GPH pumps. Higher flow equals more circulation and oxygen for larger or more plants.

How large should the central reservoir be scaled in a RDWC setup?

Generally, allow at least 5 gallons of reservoir capacity for each mature plant in your system. So, 5 tomato plants would need a minimum 25-gallon reservoir to provide sufficient water volume and nutrients in between solution changes. Scale up accordingly for commercial production.

Filed Under: Hydroponics growing, Indoor gardening Tagged With: dwc-system, how-to, hydroponic-systems, indoor, indoor-hydroponic-garden, rdwc-system

What Is the Aquaponics System?

Roger Peters by Roger Peters | Last Updated: January 16, 2024 1 Comment

Aquaponics presents an innovative method of food production integrating aquaculture fish farming with soilless plant cultivation in a sustainable closed-loop ecosystem. This symbiotic pairing enables fish and plants to thrive off each other within a recirculating water system, effectively growing two crops simultaneously. Aquaponics offers a chemical-free alternative to traditional gardening, conferring environmental and food safety advantages unique to these distributed ecosystems.

When designed properly, this interconnected aquatic network strikes the right balance to provide fish, bacteria, and vegetation exactly what each organism needs to thrive sustainably. Careful monitoring and maintenance of water parameters preserves the fragile equilibrium. Understanding how to construct the interdependent components and control an aquaponic environment leads to abundant fresh harvests of fish and plants grown organically.

What Is Aquaponics?

Aquaponics refers to any recirculating agricultural system combining conventional aquaculture fish farming with soilless plant cultivation in a unique symbiotic environment. This integrated bio-cycle facilitates the conversion of fish waste into vital plant nutrients for maximizing production of both vegetables and protein within the same recaptured water supply.

5. Back to the Roots Water Garden, Self-Cleaning Fish Tank, Mini Aquaponic on the table by the window two decor options
Image: Back to the Roots Water Garden, Self-Cleaning Fish Tank, and Mini Aquaponic on the table by the window are two decor options.

At the foundation of aquaponics is establishing a balanced mini-ecosystem wherein the fish waste gets transformed into plant food and the water gets purified through natural processes. Fish raised in tanks metabolize feed and excrete ammonia-rich effluent, which accumulates within the water. A separate biofilter containing helpful nitrifying bacteria converts the toxic ammonia first into nitrites then into water-soluble nitrate compounds usable by plants as fertilizer.

The nutrient-enriched water then gets pumped from a sump tank through long channels or raft beds supporting seedlings anchored in inert growing media like perlite, clay pebbles, or vermiculite instead of soil. Plants flourish through absorbing nitrates from the passing water for full nutritional supplementation tailored organically to their growth phase. Concurrently, the water gets filtered by plant roots before returning purified back to the fish habitats, completing the cycle.

aquaponics historia

This symbiotic process ultimately facilitates two flourishing crops, providing home-grown seafood and vegetables. With the right balance and monitoring, the system’s integrated organisms thrive while recycling precious resources. The end result allows year-round chemical-free food production even in non-ideal environments like cities, using 90% less water than soil farming. Aquaponics sustainably unlocks immense abundance.

See More Images
Back to the Roots Water Garden, Self-Cleaning Fish Tank, Mini Aquaponic Ecosystem – Best Aquaponic NFT System
Read Verified Customer Reviews
If you click this link and make a purchase, we earn a commission at no additional cost to you.

How Does Aquaponics Work?

Aquaponics leverages the nitrogen cycle to convert toxic fish waste into essential plant nutrients through an interconnected cultivation process within a recirculating water supply. This cyclic conversion engages three integral organisms — fish, nitrifying bacteria, and plants — to sustain a stable aquatic environment where two crops flourish synergistically.

It begins with fish species like tilapia, trout, catfish, and perch being raised in tanks where they eat feed containing protein and release ammonia-rich waste. This ammonia accumulates within the water, becoming highly toxic if left unchecked. Fortunately, a subset of beneficial bacteria known as nitrosomonas coverts ammonia into nitrites then nitrobacter bacteria transform nitrites into nitrates.

These nitrates dissolve easily in water, where they get channeled from a central sump tank into plant grow beds filled with inorganic media supporting seedlings. As the enriched water flows past plant roots, the vegetation absorbs the vital nitrates as «food» to spur growth. Concurrently, plants filter and purify the water through their natural processes.

This filtered water then returns to the fish tanks cleaner than when it left, starting the cycle anew. By leveraging these interconnected organisms and their metabolisms, both fish and plants receive exactly what they need through a sustainable ecological partnership requiring no fertilizers. Careful monitoring of water chemistry preserves the system’s delicate balance.

detailed diagram of the aquaponics system with description

Additional biofiltration using materials like lava rock harboring nitrate-generating bacteria may supplement nutrient delivery. But the central aquaponic process provides natural plant food while scrubbing water clean through cost-effective biological filtration and recirculation.

Gardzen 5-Set Garden Propagator Set, Seed Starter Tray with 350-Cell Gardzen 5-Set Garden Propagator Set, Seed Starter Tray with 350-Cell
  • Base 18
  • Propagating to catch the excess water that drains from seed trays
  • Keep Seeds Grow Healthy
Check Price
If you click this link and make a purchase, we earn a commission at no additional cost to you.

Advantages of Aquaponics System

Aquaponics delivers an array of unique benefits distinguishing the synergistic water-based ecosystems as smarter, safer, and more sustainable than conventional soil gardening. By effectively growing fish and plants symbiotically within recirculating water reservoirs, aquaponics confers advantages spanning water conservation, reduced labor, improved crop yields and quality, organic certification, and year-round production potential.

The main merits of utilizing these integrated aquaculture systems include:

  • Improved water efficiency. Aquaponics recirculates nearly 90-95% less water than soil-based gardening, conserving this precious resource. Water continually gets reused once introduced into the closed-loop system. Little moisture gets wasted through evaporation, since beds grow plants partially suspended. Careful monitoring preserves optimal water oxygenation, microbial life, and nutrient balances.
  • No weeding or pesticides. Aquaponics systems avoid common garden pests and weed issues by foregoing soil. Seedlings instead anchor in inert grow media like gravel. Since pests largely dwell in soil, hydroponic based plants stay protected. You also never weed beds, further reducing maintenance. Avoiding pesticides and herbicides promotes healthfully clean crops.
  • Reduced labor needs. The automated recirculating system, avoidance of soil, and nearly self-sustaining aquatic environment greatly reduce physical labor. No digging beds, applying fertilizer, hauling hoses for watering, or handling compost exists with aquaponics. Systems operate electronically, leaving mostly feeding, planting, and harvest tasks for farmers. Infrequent monitoring ensures equilibrium.
  • Dual crops. Unique to aquaponics is sustainably producing two full crops — fish and vegetation — in an integrated model. Fish like tilapia can grow over a pound while reaching harvest size just as fast as plants. Having reliable alternate protein sources and fresh greens simultaneously proves invaluable for household food independence.
  • Increased safety. With no soil or use of synthetic chemicals, aquaponics grows certified organic foods, eliminating health risks. Fish and plants avoid accumulating mercury, pesticides, or pollutants from soils present in conventionally grown foods. Consuming home-raised sustainably-grown protein and veggies provide peace of mind.
  • Smaller land use. Efficient space usage within aquaponics enables immense yields even with a limited footprint. Plants orient vertically on racks to maximize light, while fish comfortably densify tanks. Compared to commercial options, home systems tailor scale for garage, greenhouse, or backyard confinement without sacrificing abundant capacity through precise configuration.
  • Year-round growth. Given the enclosed and climate-controlled aquatic environment facilitated by aquaponics, sustained year-round harvests become possible. Indoor systems leverage supplemental lighting and heat, while outdoor systems utilize greenhouses for weather protection. Gardening expansively without concern for seasons or weather makes these systems powerful for self-sufficiency.

grow tent diagram scheme with grow lights, ventilation, plants and 5 gallon bucket systems

TheBudGrower Complete All-in-One Home Grow Solution 4x4x7ft- 2200W(2) TheBudGrower Complete All-in-One Home Grow Solution 4x4x7ft- 2200W(2)
  • LED lights specialty manufactured by VIVOSUN with Samsung LM301 diodes for FULL spectrum light
  • The industries most durable grow tent – heavy duty 1680d oxford cloth
  • Money & energy saving complete home grow tent kit
Check Price
If you click this link and make a purchase, we earn a commission at no additional cost to you.

Disadvantages of Aquaponics

While aquaponics delivers immense advantages over conventional farming models, the integrated plant and fish cultivation ecosystems also pose unique challenges and downsides to factor into system adoption decisions. Aquaponics requires more upfront investments, operational energy inputs, space commitments, equipment knowledge, and attentive monitoring than basic gardening.

Carefully weigh the following central disadvantages against the merits before installing home aquaponic systems:

  • Higher upfront costs. Constructing and equipping a productive aquaponic system demands more upfront investment than a standard garden since specialized tanks, plumbing, pumps, and accessories prove necessary. Expect general startup costs between $500-$1000 for smaller home systems, with expenses climbing for commercial scales. Operating costs also run higher long-term from continual electrical usage.
  • Energy dependence. The aquaponic ecosystem relies heavily on electrical energy for powering all integrated pumps, water heaters, aerators, and lights during non-peak solar hours. Systems lack functionality when electrical sources get interrupted. Backup battery and generators become essential for locations with frequent outages to avoid catastrophic crop and fish losses.
  • Space constraints. While highly space-efficient, aquaponics systems do impose minimum physical size requirements for fish tanks and plant grow beds to sustain balanced yields long-term. Outdoor systems also necessitate level ground with southern sun exposure and greenhouse or polytunnel protection in colder climates. Indoor systems compete for living space.
  • Ongoing monitoring. Maintaining effective aquaponic ecosystems requires daily monitoring of water temperature, pH, nitrogen levels and biofilter health. Testing and correcting imbalance issues demands more attentiveness than passive gardens. Failing to routinely sample water chemistry risks disrupting the delicate equilibrium and causing system crashes.
  • Specialized knowledge. Successfully orchestrating the interconnected components within aquaponics requires specialized knowledge spanning water quality management, hydroponics, aquaculture, nutrient dynamics and plumbing. Most systems benefit from automation gadgets and accessories, further necessitating technological proficiencies for smooth integration. The learning curve proves steeper than basic gardening.
  • Low flexibility. Customizing an established aquaponics system lacks flexibility unlike other hydroponics methods. The ratio of fish tanks to plant beds needs strict balance to facilitate effective biofiltration. Adding more fish demands more plants and vice versa along fixed ratios to avoid ecosystem overload and toxicity.
  • Fragile equilibrium. Perhaps the biggest downside centers on the delicate ecosystem equilibrium underlying aquaponics. Myriad factors from water chemistry to environmental shifts threaten balance. Changes in water alkalinity, ammonia spikes, oxygen deficits, equipment failures, and cold snaps risk disrupting fragile system stability. Recovering balance after crashes proves extremely challenging. Meticulous, preventative monitoring represents the only hedge.
Water Quality Tester, Accurate and Reliable, HoneForest Water Quality Tester, Accurate and Reliable, HoneForest
  • TDS Meter, EC Meter & Temperature Meter 3 in 1
  • 0-9990ppm Test Meter for Drinking Water
  • For Hydroponic System, Aquariums
Check Price
If you click this link and make a purchase, we earn a commission at no additional cost to you.

Varieties of Aquaponics System

Several primary design configurations exist for constructing aquaponic systems, each utilizing different growing bed styles to support vegetation rooted in inert media while interacting with water channels transporting fish effluent. The major aquaponics system varieties include media bed, raft, nutrient film technique (NFT), and hybrid models.

Media Based Aquaponics System

Media based aquaponics systems feature elevated beds filled with porous substrates like clay pebbles, perlite, vermiculite or gravel that anchor plant roots while facilitating water drainage. Nutrient-rich water from fish tanks gets pumped onto the top of long media beds, then drains through plant roots before recirculating back clean. Media effectively traps helpful biofilter bacteria that convert fish waste into plant nutrients between cycles.

Media bed systems prove the simplest to establish for beginners while supporting the widest diversity of vegetables and herbs. Media neutralizes water acidity while aerating and oxygenating flows for fish. However, grow bed cleaning and media replacement represents added maintenance. Flood and drain cycles must also run frequently to ensure plants never dry out.

Raft System

Also referred to as float, deep water culture systems position plants in perforated plastic raft boards floating directly on top of water channels linked to fish tanks. Plant net pots hang through raft holes with roots dangling freely into the water, absorbing nutrients. No media gets used, though some systems add substrate to plant cups for stability.

Raft systems deliver highly oxygenated water to roots while using space efficiently in multiple stacked raft rows. However, exposed dangling roots risk disease without proper water sterilization. Plants get limited to quick growing greens and herbs able to develop in the hydroponic channels. Timing plantings also proves trickier, making rafts better suited for intermediate growers.

Nutrient Film Technique (NFT)

In NFT aquaponics, a very shallow stream of water (just 1-3mm) constantly flows through piping channels in a closed-loop down a slight grade back to sump tanks. Plants anchor in holes pierced along the piping length, positioning bare roots to directly contact the minimal required water volume for nutrient absorption.

NFT systems conserve water excellently and sustain oxygenation with increased flow rates. However, precision around slope gradients and consistent flow ranks vital to prevent waterlogging or dry pockets that risk plant health. Intolerant plants like tomatoes struggle, while fast growers like lettuces thrive using NFT aquaponics.

Hybrid Aquaponics System

Hybrid aquaponic systems combine multiple growing bed styles like media beds + raft tanks to leverage unique advantages. Typically, a sump tank splits water flows between fixed media beds for filtration and rafts/NFT channels for rapid plant growth. Hybrid models allow increased stocking densities through expanded biofiltration while tailoring options.

The main drawback of hybrid aquaponics remains increased complexity around split water flows and filtration demands. Carefully calculating plant and fish counts per system square foot requires accuracy to balance the shared aquatic environment. Once stabilized, hybrid systems enable improved plant variety, harvest rates, and succession planting flexibility.

RDWC 5 Gallon bucket system scheme whith air pump and timer anf example plants in 4 plant buckets and 1 only nutrient bucket

Recirculating Deep Water Culture (RDWC) Hydroponic Grow Kit System Recirculating Deep Water Culture (RDWC) Hydroponic Grow Kit System
  • Reservoir Bucket Connected to 4 Grow Buckets
  • 400 Gallon/hour Circulating Pump
  • Large 5 gallon square buckets, pre-drilled
Check Price
If you click this link and make a purchase, we earn a commission at no additional cost to you.

Components of an Aquaponic System

Aquaponic systems leverage a synergistic combination of critical integrated components that collectively facilitate the conversion of fish waste into plant nutrients for enabling abundant yields of both protein and vegetables. The primary pieces constituting a fully functional, balanced aquaponic ecosystem include habitats securing fish populations, biofiltration mechanisms to convert waste, hydroponic beds supporting vegetation, water reservoirs and circulation pipes, and environmental controls regulating lighting, temperature, and chemistry.

Key elements comprising aquaponics units involve:

  1. Fish tank. Suitable aquaculture fish tanks provide secure, high-density habitats optimized for species like tilapia, catfish, trout and Koi selected based on climate suitability. Tanks contain fresh water, oxygenation tubing, feeding ports and effluent overflows connected via piping to filtration units in sizes scaled to fish growth rates. Cylindrical tanks maximize fish capacity per volume, while rectangular tanks simplify construction using cost-effective liners.
  2. External biofilters provide additional surface area to harbor the nitrifying bacteria that transforms toxic fish ammonia into nitrates usable by plants as nutrients. Components like round plastic media, lava stones, gravel substrate, and pipe fittings maximize colonies of nitrosomonas and nitrobacter bacteria between the fish effluent source and plant grow beds.
  3. Hydroponic grow beds. Inert hydroponic grow beds spun from durable plastics or built from wood/concrete materials contain specific lava rock media supporting seedlings. Beds leverage a siphon flood-and-drain system to fully saturate plant roots with oxygenated, nutrient-rich water before draining. This wet-dry cycling pattern prevents overwatering while optimizing nutrient absorption.
  4. Sump tank. Centralized sump tanks collect, store, and pump purified water between the clarifying zone, biofilter, and finally hydroponic grow zones in a looped flow powered by water pumps and air stones. Sumps enable monitoring key water chemistry like pH, nitrogen levels, clarity, and temperature through testing ports and drain valves while securing pump intakes.
  5. Plumbing network. Food-grade PVC, PEX or flexible tubing rated for exposure to sunlight, heat, and moisture durably channels water flows connecting fish tanks to biofilters, sumps, grow beds and back continuously. Bulkhead fittings, elbows, and piping slopes maintain optimal pressure and flow rates scaled to system size and pump capacities, preventing backflows or floods.
  6. Water pumps and aeration. Water pumps suited for solids circulation provide consistent flow rates to drive the water securely through piping across all system zones — from fish tanks through filters back to plant beds. The pump’s size selection depends on lift height and optimal gallon per minute rating. Air pumps and weighted air stones infuse water with oxygen to maintain life supporting qualities.
  7. Supplemental lighting. Full spectrum LED grow lights supplement natural lighting over planted zones to fuel indoor growth and offset reduced winter durations. Lighting simulates optimal wavelengths for vegetative leaf crops and flowering fruits set to photoperiod timers with adjustable hangers at 18–24 inches from plants. Lights assist greenhouse warmth or acclimate seedlings pre-transplanting into grow channels.
BN-LINK 7 Day Heavy Duty Digital Programmable Timer, FD60 U6 BN-LINK 7 Day Heavy Duty Digital Programmable Timer, FD60 U6
  • Allows you to easily set up to 8 on/off programs for each timer’s two grounded outlets
  • 115V, 60Hz, Dual Outlet,
  • Security UL Listed(2 Pack)
Check Price
If you click this link and make a purchase, we earn a commission at no additional cost to you.

How to Set Up an Aquaponic System?

Constructing a fully-functioning home aquaponics system encompasses planning, procuring, positioning, interconnecting, and populating the comprehensive ecosystem supporting sustainable fish and plant production. Carefully assembling tanks, raceways, beds, plumbing, pumps, and accessories precedes cycling procedures that establish essential bacteria responsible for converting fish waste into plant nutrients.

Assembling the System Components

Research then acquire all required system parts including appropriately sized fish rearing tanks, media beds, sumps, and plumbing pipes/tubing scaled for your desired plant and fish capacity. Stage equipment centrally in the space or greenhouse allotted for the aquaponics system based on layout plans factoring in piping runs, outlet proximity, and solar exposure.

Build media beds, securing them level using lumber frames lined with durable plastic sheeting able to retain 100–150 gallons of expanded clay aggregate media supporting seedlings. Purchase juvenile fish once fully cycling the system while keeping fry tanks established as nurseries for natural propagation. Invest in water testing kits, netting, heaters, pumps, tubing, and accessories preparing for system interconnection.

BLOOM PLUS LED Grow Lights, BP 2500W 2X4ft Coverage Grow Light Use with 646packs Samsung Diodes(Includes IR) BLOOM PLUS LED Grow Lights, BP 2500W 2X4ft Coverage Grow Light Use with 646packs Samsung Diodes(Includes IR)
  • For Indoor Hydroponic Plants Seeding Veg and Bloom
  • Dimmable Sunlike Full Spectrum Plant Grow Lights
  • 30-day money-back guarantee and a trusted 3 years warranty
Check Price
If you click this link and make a purchase, we earn a commission at no additional cost to you.

Connecting Piping

Measure then cut food-safe PVC, PEX or flexible agricultural piping segments to create channels routing water flows from the fish tank outlet to external biofilters then into central sump tanks through to planted media beds before returning purified flows back to fish habitats in a complete loop.

Slope piping appropriately to leverage gravity assisting pump pressure driving filtration. Secure all joints and valves tightly while checking for leaks. Attach supplemental aeration tubing enriched with oxygen to supplement life support for fish during the cycling process. Install auxiliary components like grow lights, heaters, monitoring sensors, and automation controls once plumbing assembly finishes.

Cycling and Cultivating Essential Nitrifying Bacteria

Before introducing fish and plants, aquaponic systems require «cycling» — a 2-8 week period establishing vital nitrifying bacteria responsible for converting toxic fish metabolic waste like ammonia into nitrites then nitrates usable by plants. To cycle, add a few hardy fish or pure ammonia to enable bacteria colony development on all wetted surfaces.

Test daily for ammonia and nitrite spikes then reductions signaling the rise of essential nitrobacter and nitrosomonas bacteria instrumental for system equilibrium. Once achieving measurable nitrate levels, dosing additional ammonia should see full conversion to nitrates within 24 hours, signaling complete cycling. Now transplant juvenile fish stocks and small seedlings, monitoring plant health and water chemistry closely to ensure the aquatic ecosystem starts balancing towards stability.

Optimizing Fish Health and Nutrition

nutrient solution for hydroponic systems

Ensuring healthy fish represents the foundation for productive aquaponic ecosystems, since robust fish populations directly facilitate plant fertility through waste. Monitor fish growth rates, behaviors, colors, and tank conditions daily as indicators of wellness. Maintain proper tank conditions within acceptable pH, temperature, oxygenation and ammonia ranges per respective species.

Feed fish balanced diets high in vitamins and proteins suited for individual growth stages at appropriate intervals to fuel fish size gains without polluting water. Pellet mixes tailored for tilapia, catfish, trout and other common aquaponic species prove widely available. Adjust food amounts to align with estimated fish biomass present, avoiding overfeeding.

Table1. hydrogardengeek.com 10 Cool Fish for Aquaponics System table image

hydrogardengeek com 10 Cool Fish for Aquaponics System table img

Plant Care

Cultivate young seedlings first in nursery trays then transplant into net cups securing plants into grow beds filled with expanded clay media. Select from leafy greens, herbs, tomatoes, peppers, beans, strawberries and other high yielding produce suited for aquaponic settings. Monitor seedlings daily for signs of nutrient deficiencies, indicated by discolored or curling leaves requiring water chemistry or flow adjustments.

Prune and trellis plants as needed to optimize fruiting and light exposure. Test media acidity, since plants periodically lower pH levels, countered by adding lime or potassium carbonate buffering compounds when needed. Rotate annual crops to sustain vitality and prevent disease transmission across plant generations utilizing the same grow beds.

Bluelab MONGUA Monitor for pH, Temperature, Conductivity (TDS) Bluelab MONGUA Monitor for pH, Temperature, Conductivity (TDS)
  • For pH, Temperature, Conductivity (TDS)
  • Rogers finest 3 in 1 Meter
  • Ph meter for water hydroponics
Check Price
If you click this link and make a purchase, we earn a commission at no additional cost to you.

Pruning

Pruning and trimming plants maintains foliage and directs growth patterns for increased yields. Prune lower leaves, shading beds to optimize light penetration reaching upper, productive leaves. Prune older exterior tomato stems to focus energy on developing interior flowers and fruits. Tip pruning herbs often encourages denser, bushier plants.

plant roots in a basket in a hydroponic system

Harvest lettuce leaves from the outside, working inward to extend yields. Transplant and replace underperforming plants. Compost or discard all fallen leaves, stems and dead plants to sustain quality conditions. Closely monitor for pest insects after pruning and exercise quarantine procedures at the first sign of infestation.

Pest Monitoring

While hydroponic based aquaponic systems limit exposure to soil-borne insects, monitoring for fungus gnats, mites, aphids and whiteflies remains vital to avoid population explosions threatening crops. Utilize integrated pest management leveraging predatory beneficial insects before resorting to organic insecticidal soaps or neem oil sprays.

Dispose of pest damaged plants immediately. Prevent flies from laying eggs in media by ensuring no areas dry out completely between flood cycles. Introduce ladybugs and green lacewings to naturally control aphids without chemicals. Maintain grow bed and tank coverage with fine nets to exclude pests. Isolate and treat any infested plants quickly to prevent spreading.

General Hydroponics pH Control Kit for a Balanced Nutrient Solution General Hydroponics pH Control Kit for a Balanced Nutrient Solution
  • Reliability and ease-of- use
  • Reliable results. Includes 8 oz.
  • Recommended pH for most plants is 5.5 to 6.5
Check Price
If you click this link and make a purchase, we earn a commission at no additional cost to you.

What Do You Need to Know Before Starting an Aquaponics System?

Aquaponics allows you to grow fish and plants together in one integrated ecosystem, but getting started requires some key knowledge. As you plan your aquaponics system setup, be sure to educate yourself on these key topics:

  • The nitrogen cycle is the process that converts fish waste into plant nutrients. Understanding the nitrogen cycle involving ammonia, nitrites, nitrates, and beneficial bacteria is crucial for balancing water chemistry. Monitor water parameters daily at first to ensure your nitrogen cycle and biofilter are fully established.
  • Water quality must be carefully controlled for both fish and plants to thrive. Test pH, ammonia, nitrites, and nitrates regularly with test kits. Know ideal parameter ranges and make adjustments quickly when levels go out of spec. Good water quality is essential to system health.
  • Aquaponics systems rely on beneficial bacteria to function. Biofilters with lots of surface area grow colonies of good bacteria that convert toxic wastes into usable plant food. Care for your biofilters by avoiding chlorinated water, which kills bacteria and stalls the nitrogen cycle.
  • The stocking density refers to how many fish are housed per gallon of water volume. Understand ideal stocking densities for your fish species and system size to prevent overcrowding issues. Stock conservatively at first while monitoring water quality.
  • System hydraulics involve managing how water flows through different components. Pump flow rates, pipe sizing, and timers controlling fill/drain cycles impact system hydraulics. Balance flow to grow beds and hydroponic sections based on plant needs and system capacities.
  • Automation technologies like controllers and sensors help simplify system operation while increasing reliability and preventing disasters if any parameters go out of spec. Use technology appropriate for your system size and budget to stabilize conditions. Monitor notifications and alerts.
  • Do extensive research before getting started, attend training workshops if possible, or find an experienced mentor. Aquaponics requires diverse skills from agriculture, engineering and data analysis. Proper foundations set new systems up for success rather than failure.
  • Start small, master basics, and scale up over time. Small starter systems teach essential ecosystem dynamics while limiting risks and costs. Pilot your methods, measure results often, and expand the system size once fundamentals are under control. Patience and persistence pay off.

46 Aerospring 27-Plant Vertical Hydroponics Or An Aeroponics Indoor Growing System

Aerospring 27-Plant Vertical Hydroponics Indoor Growing System Aerospring 27-Plant Vertical Hydroponics Indoor Growing System
  • Easy to use aeroponic system for your home
  • Fan - Grow Lettuce, Herbs, Veggies & Fruits
  • Grow smart & eat healthy, 20 gallon water reservoir Grow Tent, LED Grow Lights
Check Price
If you click this link and make a purchase, we earn a commission at no additional cost to you.

FAQs

How to choose fish for aquaponics system?

When selecting fish species for an aquaponic system, consider factors like ideal water temperature range, availability of fingerlings to stock the system, maximum adult size and growth rates, market prices if selling the fish, and dietary needs.

Popular aquaponic fish choices include tilapia, koi, goldfish, catfish, bluegill sunfish, rainbow trout, perch, carp, Arctic char, large mouth bass and barramundi. Ensure the fish species you select is compatible with your climate and available supplies in your region.

What are the main differences between aquaponics and hydroponics?

The main differences between aquaponics and hydroponics relate to nutrient sources and system components. Aquaponics relies on fish raised in the system to produce waste that gets converted by beneficial bacteria into an organic nutrient solution to feed plants.

This creates a natural ecosystem with both animal and plant components. Hydroponics relies on an inorganic nutrient solution, typically combining chemicals like potassium, nitrogen, phosphorus, calcium and magnesium.

What can you grow in an aquaponics system?

Aquaponics allows for a wide variety of plants, vegetables, herbs, and fruits to be grown hydroponically. Some of the most common options are leafy greens like lettuce, spinach, kale, swiss chard, as well as tomatoes, peppers, herbs, strawberries, beans, peas, and many more. The nutrient rich water from the fish supports nearly any type of plant!

What kind of fish work best in aquaponics systems?

Certain fish species are well-suited for home or commercial aquaponics. Popular freshwater fish choices are tilapia, perch, catfish, large mouth bass, bluegill, and koi. These fish tolerate fluctuating water conditions, adapt well to tanks, grow quickly, and produce waste to fertilize the plants. Stock density ratios range from 2 to 5 gallons per fish, depending on system size.

How much maintenance does an aquaponics system require?

While aquaponics systems are self-sustaining environments once cycled and balanced, they do require regular maintenance and monitoring. Daily checks should assess water chemistry, feeding schedules, and equipment function. More intensive weekly and monthly maintenance like water changes, biofilter cleaning, plant pruning / harvesting is vital for maximizing production. Proper system maintenance results in abundant harvests!

Tetraponics FLORATek pH, Nutrient Control System Tetraponics FLORATek pH, Nutrient Control System
  • Automated Water Monitor
  • Doser with Temperature, pH, and EC (ppm) Probes
  • 3 Pumps for pH, A and B Nutrients
Check Price
If you click this link and make a purchase, we earn a commission at no additional cost to you.

Filed Under: Hydroponics growing, Indoor gardening Tagged With: aquaponic, aquaponics-system, how-to

Dutch Bucket Hydroponic System

Roger Peters by Roger Peters | Last Updated: January 16, 2024 Leave a Comment

Hydroponic gardening has been gaining popularity among home gardeners and small-scale farmers in recent years. One particularly effective type of hydroponic system is the Dutch bucket system. In this simple yet highly customizable setup, plants grow in inert media inside buckets, with the nutrient solution delivered directly to the roots.

The Dutch bucket system offers a number of advantages over other hydroponic and soil-based growing methods. The enclosed buckets protect plant roots while allowing control over factors like aeration and nutrient levels. This leads to faster growth rates and higher, more consistent yields. Dutch bucket systems also conserve water and fertilizer compared to soil gardening. In this article, we will cover everything you need to know about planning and installing your own Dutch bucket hydroponic system.

What is a Dutch Bucket System?

A Dutch bucket hydroponic system is a type of container gardening that uses inert growing media and nutrient reservoirs to grow plants in buckets or pots without soil. This method earned its name from the Dutch, who refined and popularized the technique.

Dutch Bucket System
Img: Dutch Bucket Hydroponics System Schema

In a Dutch bucket setup, plants are housed in plastic buckets, usually between 5 and 10 gallons in capacity. A basket or pot with holes holds the growing media while allowing room underneath for the roots to access oxygen and nutrient solution. Clay pebbles, perlite, vermiculite, coconut coir, and rockwool are common options used for the inert media.

The buckets feature a fill tube and drainpipe. The fill tube is situated above the growing media basket and is connected via tubing to a nutrient reservoir, usually housing 20–35 liters of aqueous solution. A submersible pump pushes the solution to the fill tube, where it trickles down through the media to feed plant roots. Excess drips out through the drainpipe back into the reservoir.

Plants draw water and nutrients as needed, while their roots remain protected and aerated. Growers can control nutrient levels and other conditions in the reservoirs. Multiple buckets can be linked to one reservoir or use individual reservoirs for each bucket.

The stackable vertical design allows efficient use of indoor or greenhouse space. It’s suitable for leafy greens, herbs, tomatoes, peppers, cucumbers, and other vegetables and fruits. With optimized nutrients and lighting, Dutch bucket systems can achieve rapid, bountiful harvests.

8 AeroGarden Farm 24Plus with Salad Bar Seed Pod Kit

AeroGarden Farm 24Plus with Salad Bar Seed Pod Kit - Indoor Garden with LED Grow Light, Black AeroGarden Farm 24Plus with Salad Bar Seed Pod Kit - Indoor Garden with LED Grow Light, Black
  • Indoor Garden with LED Grow Light, Black, Automatic timer makes sure the lights go on and off
  • Adjustable grow height of 24Inch, and can be stacked with other Farm gardens
  • Includes two Salad Bar Seed Pod Kits, featuring 9 lettuce pods, 3 herb pods, and 12 tomato pods
Check Price
If you click this link and make a purchase, we earn a commission at no additional cost to you.

How Does a Dutch Bucket Method Work?

The Dutch bucket hydroponic system works by delivering nutrient-rich solution directly to the roots of plants grown in an inert medium. This method maximizes growth while eliminating soil and many of its limitations.

Inside each Dutch bucket is a basket or pot filled with growing media such as clay pebbles. The media provides support for plant roots while having large pores that allow oxygenation. Below this basket are the bucket drain holes leading down to the reservoir.

Dutch Bucket system hydroponic schema example in the room with air pump and timer
Img: Dutch Bucket Hydroponics System Schema 2

A submersible pump moves the nutrient solution from the reservoir up through a fill tube situated above each bucket. The solution then flows down through the inert media, surrounding the plant roots. Gravity draws excess solution back down through drain holes into the reservoir. As plant roots take up water and nutrients, the level of solution in the reservoir decreases. Float valves help maintain adequate water levels by triggering the pump to turn on when more solution is needed.

Careful monitoring of pH and EC (electrical conductivity) levels allows growers to provide an optimized hydroponic nutrient solution for their specific crops. Deficiencies can be quickly corrected by adjusting reservoir nutrients. And by keeping an aerated, protective layer of media around roots, plants grow faster and more vigorously than in traditional soil methods.

Light levels, temperature, humidity, and other environmental factors can also be modulated to maximize production. The vertical orientation of Dutch bucket systems increases yields per square foot. By precisely controlling the root zone environment, Dutch bucket hydroponic gardens can produce higher yields with faster growth cycles compared to conventional gardening. This makes it a popular technique from small backyard greenhouses to commercial operations.

46 Aerospring 27-Plant Vertical Hydroponics Or An Aeroponics Indoor Growing System

Aerospring 27-Plant Vertical Hydroponics Indoor Growing System Aerospring 27-Plant Vertical Hydroponics Indoor Growing System
  • Easy to use aeroponic system for your home
  • Fan - Grow Lettuce, Herbs, Veggies & Fruits
  • Grow smart & eat healthy, 20 gallon water reservoir Grow Tent, LED Grow Lights
Check Price
If you click this link and make a purchase, we earn a commission at no additional cost to you.

Advantages of Growing with Dutch Bucket System

The Dutch bucket hydroponic system offers several major advantages over other gardening methods:

  • Increased growth rates. The highly controlled root zone environment allows plants to grow up to 50% faster compared to soil gardening. Optimized nutrient levels delivered directly to roots accelerate plant development. And inert media offers better oxygenation for robust growth. The Dutch bucket system makes it possible to achieve more harvests per year.
  • Higher yields. Growth rates translate into higher total yields over a full harvest cycle. And dialed-in nutrient solution levels reduce plant stress while supporting the full genetic potential. This consistency makes yield predictions more accurate. Indoor Dutch bucket gardens can produce up to 20 times the yields of outdoor soil planting.
  • Water and space efficiency. Dutch bucket systems use a fraction of the water needed for traditional gardening. Recirculating nutrient solution without leakage or evaporation conserves water. The vertical stackable design also allows growing more plants per square foot for efficiently using indoor or greenhouse space.
  • Reduced disease and pests. By isolating plants from soil pathogens, Dutch bucket systems avoid common root diseases. And indoor systems prevent most pests, though checks should still be made for aphids and mites. Healthy roots and growth make plants less vulnerable to the pests they do encounter.
  • More control and customization. From nutrients to lighting and environmental conditions, Dutch bucket gardens allow meticulous control over the root zone and whole plant environment. Growers can easily customize and experiment to optimize outputs. These systems can scale up incrementally, making them ideal for small starts ups.
  • Lower operating costs. Once initially set up, Dutch bucket systems can save money over traditional soil gardening in terms of water, fertilizer, pesticides, and labor costs. Recirculating water and nutrients reduces expenses substantially. And minimizing pest threats decreases or eliminates pesticide costs while supporting organic approaches. Higher yields and faster harvest cycles also maximize profits.
  • Less physically demanding. Bending, digging, weeding and heavy lifting takes a toll with soil gardening. Dutch bucket systems place plants at an ergonomic height, minimizing strain. Inert media takes the pain out of weeding and digging. Reservoir tanks can also be positioned to avoid heavy lifting. For aging or disabled gardeners, these conveniences expand accessibility.

Disadvantages of Using Dutch Bucket Hydroponics

While Dutch bucket hydroponic systems have many benefits, there are some potential downsides to consider as well before installing one. A few key disadvantages include higher startup costs, increased technical complexity, susceptibility to power and equipment failures, and environmental control challenges:

  • Higher initial investment. Constructing or purchasing a full Dutch bucket system carries more upfront costs than simply planting in the ground. There are expenses associated with materials like containers, growing media, reservoirs, plumbing and the supporting structure. Lighting, pumps, timers and other gear also represent an investment. But over time, increased outputs can offset costs.
  • Increased technical complexity. These systems require specialized knowledge around topics like nutrient mixing, pH management, hydroponic best practices and electronic equipment maintenance. While commercially available mixes simplify nutrients, monitoring and adjustments is still a requirement. Technical aptitude, research or expert guidance is beneficial when getting started.
  • Susceptibility to critical failures. Dutch bucket gardens depend on consistent electricity, proper mixing of reservoir nutrients and functioning gear like pumps, lines and floats. Power outages, depleted nutrient tanks, broken pump impellers or flooding can quickly lead to plant damage or losses if not addressed immediately. Redundant systems provide backup.
  • Difficult environmental control. A greenhouse or enclosed indoor space is needed to prevent rainfall from diluting carefully optimized nutrient solutions in Dutch bucket systems. Challenges like maintaining ideal temperatures or humidity levels exist in any indoor gardening. Lighting requirements also lead to higher energy costs. Backup power generators combined with HVAC and humidity control equipment can mitigate environment risks.

The Main Components of a Dutch Bucket Method

3 Dutch buckets hydroponics Artisun Technology Dutch Bucket 10-pack

A Dutch bucket hydroponic system relies on just a few key components working in harmony to cultivate thriving, high-yielding plants. These essential elements include the reservoir, pump, drain pipes, fill tube, growing media, and the buckets themselves.

Reservoir

The reservoir serves as the lifeblood of a Dutch bucket system, housing the nutrient-rich solution that feeds the plants. Typically made of plastic or other non-reactive materials, Dutch bucket reservoirs hold from 20 to 35 liters of water containing all the essential macro and micronutrients plants need.

Growers can use commercially premade formulas or mix their own solution if properly diluted and pH balanced.  Float valves help automatically maintain full reservoir levels. Larger systems may have one central tank for all buckets, while smaller setups might use independent reservoirs for each bucket.

Pump

Drawing up nutrient solution from the reservoir, pumps deliver it to the buckets’ fill tubes where it can drain through to the plant roots. Submersible pumps are commonly used for their ability to operate fully immersed in the tank water. With flow rates between 100 and 300 liters per hour, these fuel-efficient pumps run only as needed.

Installing a secondary backup pump provides redundancy in case the main pump fails, preventing interrupted delivery. Using a timer keeps nutrient solution flowing on a consistent schedule.

Drain Pipe

Excess nutrient solution trickles back down through the media into a drain pipe that returns it from each bucket or series of buckets into the reservoir for recycling. This closed-loop conservation of water and nutrients boosts the system’s operational efficiency.

Drain pipes must have adequate diameter to handle maximum flow volumes without overflowing or creating back pressure on pumps. Some setups combine both fill tube and drain into one larger pipe. Proper slope angles allow smooth gravity drainage.

How to Start Growing in Dutch Buckets?

Dutch bucket with lid hydroponic bucket system — копия

Installing a thriving Dutch bucket system requires planning, an understanding of how the components interact, and attention to critical factors like lighting and ventilation. Follow this step-by-step guide when setting up your first system for the highest chances of success.

Select a Safe Location

Choosing an appropriate spot is the crucial first step for your Dutch bucket hydroponic garden. An enclosed greenhouse or indoor room with electrical outlets allows control over conditions like sunlight, temperature and humidity. Ensure adequate structural support for the weight of filled buckets. Level ground or strong shelving improves stability. Locate near a water source to simplify filling reservoirs. And pick a space with room to access all sides for maintenance and harvesting plants.

Check your prospective Dutch bucket location for potential safety hazards. Keep away from excessive moisture that can lead to electrical issues. Avoid direct sunlight, which can overheat reservoirs and equipment. Ventilate the space for humidity control and bring in fresh air to prevent disease. Strategically place emergency cut-offs for water and electricity in case quick shutdown is ever needed. Include a backup generator among safety essentials to maintain optimal nutrient delivery.

Purchase Required Materials

Once you settle on a space, compile all the components needed — reservoirs, pumps, fill tubes, drain pipes, growing media like expanded clay pellets, buckets with lids, a base or rack for holding buckets, tubing, testing supplies, seeds or starter plants and nutrients. Consulting a Dutch bucket system guide helps identify reputable products. Shop early to have everything ready for setup day.

In acquiring gear, don’t cut corners on critical elements like growing media, lighting or nutrients. Low quality parts fail quicker. Pay special attention to the capacity and flow rate specifications on pumps and drain piping suited for your planned bucket quantity. Consider acquiring extra replacement items that wear over time, like pump impellers. Test that all electrical devices function before installing.

Arrange Materials

Mark out where different parts of the system will physically sit in the space for the most efficient flow before deployment. Set reservoirs near an outlet to run pumps and float valves. Situate drain pipes to slope downward into reservoirs. Leave room between rows of buckets to move freely and reach plants for care or harvesting. Follow manufacturer instructions for safe installation of all electrical and pump systems.

In mapping out your design, factor ease of use and ergonomics. Position reservoirs, controls and testing kits at a convenient height to avoid excessive bending. Ensure the nutrient delivery layout meets recommended tubing lengths and tube hole counts for optimal flow rates to each bucket. Drive stability by evenly distributing weight across shelving units. Leave a central aisle for accessing plants and moving harvested crops.

Make All the Connections

With all Dutch bucket components arranged in their final locations, it’s time to connect them together into an integrated system. Follow each manufacturer’s instructions carefully during this process. Cut tubing at proper lengths to link buckets to drain pipes, fill tubes and back to reservoirs. Securely fasten all tubing to prevent leaks or pops. Ensure adequate slack for some flexibility.

Double check every connection you make in the system. Attach drain pipes correctly at a downhill angle into reservoirs. Affix fill tubes securely while allowing their spray heads full range of motion to disperse nutrient solution. Utilize quality hose clamps at every junction, or risk dangerous leaks developing later. Keep tubing away from direct sunlight to avoid algae growth inside that can clog flows. Label different lines and drain pipes by bucket row.

Run a Test

Before planting any seeds or clones, test the Dutch bucket setup end-to-end. Fill reservoirs with plain pH balanced water. Initiate pump circulation, observing flow rate and watching for leaks. Check that fill tubes rotate freely and evenly distribute solution into each bucket’s growing medium. Monitor drainage through pipes back into reservoirs.

Use this dry run to validate your system design and make final tweaks. Identify any slow draining buckets indicating pipe angles need adjustment. Ensure all buckets receive equal nutrient solution flows. Make small repairs like tightening leaky joints now before roots establish. Document flow rates from reservoirs to better calculate future circulation schedules. Finally, disinfect the system using diluted bleach to eliminate pathogens before introducing plants.

Add Grow Medium

With a proven circulation system ready, it’s now time to add the inert growing medium into buckets. Expanded clay pellets are a common choice for their manageable size, strength, and pore space to aerate roots. Rinse media first to remove dust. Load each bucket’s growing pot or basket with pellets, leaving the top inch or two empty. Arrange top layers smoothly to allow even distribution of nutrient solution.

Add supplemental media only once plants mature, if roots fully occupy buckets. Discard and replace old media displaying salt buildup or signs of disease. When switching crops, sterilize buckets using bleach, a weak acid or hydrogen peroxide before refreshing media. Amend new batches with beneficial bacteria or mycorrhizae to protect young roots. Record media volumes and changes per bucket to improve consistency across growth cycles.

Construct Plant Support System

Once growing media fills the Dutch buckets, erect structures inside to support plants as they mature. Tomato cages, trellises and fabric slings effectively anchor taller crops, preventing toppling from wind or heavy fruit. Match these supports to specific crop growth habits.

For vining plants like peppers and cucumbers, install durable vertical strings within buckets. Use non-toxic metal or bamboo posts between buckets for heavier fruiting plants to vine along horizontally. Position and secure supports early before extensive root growth makes adjustments complicated. Check supports regularly for stability as crops bear more weight. Be prepared to add secondary reinforcing crosses or guy wires if needed between primary supports.

Transplant Seeds or Seedlings

With a safe, supportive environment established, transplant germinated seeds or young seedlings into the grow buckets. Gently separate and select only the healthiest starts with well-established roots for the highest survival rates after transplanting. Follow spacing guidelines, leaving enough area for mature plant diameters.

Dig shallow holes in the center of each bucket’s growing media before setting seedling roots into place. Fill buckets no more than 2/3 full during early growth stages. Cover all roots thoroughly with media, gently firming it around stems with your hands before watering plantings. Install drain pipe screens to keep loose media contained while allowing fluid flows. Transplant swiftly to minimize root shock and distress to young plants.

Add Nutrient Solutions

Dutch bucket gardening depends on dialed-in nutrient solutions perfectly balanced for each crop’s needs. Ease plants into your feeding regimen, starting with diluted mixes for vulnerable new roots. Routinely test and adjust EC, pH and ppm levels once circulation commences. Increase solution concentrations gradually as plants grow bigger and roots colonize buckets.

Closely follow recommended strength levels on commercial nutrient mixes tailored for hydroponics. Or carefully formulate your own custom blends if adding supplements. Ensure adequate calcium, magnesium and micronutrients are included along with essential N-P-K macros. Always mix fresh solutions in clean reservoirs to reduce risks of algae or pathogens accumulating. Keep close records of reservoir chemistry changes.

Most Suitable Plants for Dutch Bucket Hydroponic Culture

The highly controlled Dutch bucket environment suits a variety of fast-growing fruiting and leafy crops that can thrive with their roots constantly immersed in oxygenated nutrient solution. Some top plant varieties include:

  • Lettuce and salad greens. Crisp head, oakleaf, romaine and other lettuce varieties grow well clustered together in Dutch bucket systems. Their shallow roots absorb nutrients quickly, leading to tender, lush leaves. Lettuce matures rapidly, allowing multiple harvests per year. Popular companion greens are arugula, kale, spinach and chard.
  • Cherry, roma and beefsteak tomatoes produce abundantly in Dutch bucket culture. Support cages or trellises anchor the vigorous vines in place as fruits swell. Dial in ample calcium, potassium and phosphorus levels for strong tomato growth. Ensure consistent moisture levels and even nutrient flows for best flavor.
  • Prolific Dutch bucket pepper plants need good airflow circulation to prevent fungal diseases in this humid environment. Grow hot pepper varieties for higher vitamin content. Prune peppers early on for bushier growth and increased yields. Monitor EC closely as peppers are sensitive to salt buildup.
  • Numerous herbs appreciate the constantly moist, nutrient-dense conditions provided by Dutch bucket systems. This includes basil, parsley, oregano, thyme, sage, rosemary and cilantro. Check growth habit and root depths when arranging mixed herbs. Cautiously dose nutrients to avoid over-fertilization.
  • Prolific vining cucumbers thrive when provided trellises for support in Dutch bucket setups. Steady calcium levels produce straight, strong fruits. Ensure consistent moisture to avoid bitter taste. Pick cucumbers young and often to encourage more blossoms. Choose disease-resistant, gynoecious hybrids for high yields.
  • Given proper lighting conditions, ever-bearing strawberries yield sweet, nutritious fruit nearly year-round in Dutch bucket gardens. Use raised buckets or stacked rows for easy picking access. Test and adjust acidity levels for optimal strawberry flavor. Propagate new starter plants from runners.

Grow Medium Selections for Dutch Bucket Systems

Choosing an appropriate inert growing medium is key for healthy, productive plants in a recirculating Dutch bucket hydroponic system. Quality media properly buffers roots while facilitating air, moisture and nutrient delivery. Top media options include:

  1. Expanded clay pellets. These porous, round pellets provide excellent aeration and drainage thanks to their honeycomb structure. Clay pebbles come in various sizes from 4mm up to 18mm. The larger grades make rewetting media easier, while smaller grades offer more surface area for root contact and nutrient adhesion. Rinse pellets well before use to remove fine dust.
  2. Spun from molten rock and steel slag, water-retentive rockwool releases minerals to plant roots as it slowly breaks down. Its rigid structure resists compression from heavy crops. However, rockwool does not buffer pH fluctuations well. Pre-soak and wash rockwool before use to draw out excess salts and adjust pH levels closer to neutral.
  3. Coconut coir. It offers a sustainable, renewable media option as a byproduct of coconut harvesting. Its high cation exchange capacity helps buffer pH shifts. Coir retains moisture well while still permitting ample air circulation. Processing methods vary, so test different product absorption rates and pH levels before committing to a brand.
  4. This porous, neutral mineral provides a lightweight and inexpensive media option. Mix perlite with other growing media to increase aeration and drainage, since perlite dries out rapidly on its own. It does not directly supply nutrients, but perlite is useful for cutting heavy media like clay pebbles. Rinse perlite thoroughly before use to remove accumulated dust.
  5. Mica mineral shards accordion out when heated to create vermiculite’s porous structure, ideal for retaining both moisture and nutrients. It helps buffer pH, but is not as durable as other options. Avoid packing vermiculite too densely around plant roots so as not to inhibit oxygenation. Always rinse before using to remove mineral buildup that can negatively impact pH.
  6. Brick Shards. Fragments of deconstructed earthen clay bricks lend further weight support for vining plants or heavy fruiting crops. Unlike expanded aggregates, brick shards do not breakdown over repeated crop cycles. Biochar is produced through pyrolysis that increases porosity for added moisture retention, nutrient adhesion and microbial activity boosting root development. Use brick to augment other media mixes.

FAQs

Is it expensive to construct Dutch bucket system?

The main costs for a Dutch bucket system are the containers, growing media, nutrient supplies, water pumps, plumbing like fill/drain tubes and pipes, and any supplemental lighting. Small starter systems for a few buckets can be under $300. Larger custom setups with dozens of buckets typically range $2,000 to $5,000 or more. But they can pay back long-term via increased yields and efficiency.

What is the recommended fill level per bucket?

For mature plants, fill Dutch bucket growing containers with media about 3/4 full, leaving 3–6 inches of empty space at the top. This allows room for adding media as roots expand down over successive growth cycles. Avoid filling buckets completely, or it can lead to waterlogging.

How often should I water the plants?

The great advantage of Dutch bucket systems is they automate consistent nutrient solution delivery direct to the root zone multiple times daily through the fill tube without manual watering. Use submersible pumps and timers to schedule circulation for 15 minutes up to an hour 2–5 times per day depending on system size and plant growth stages.

Can I use Dutch bucket for aquaponic systems?

Yes, it's common to leverage Dutch bucket setups as the hydroponic component in aquaponic systems. Plant roots filter nutrient-rich water from aquatic fish tanks that would otherwise require changing. You may need one or more intermediate sump tanks for solids removal between the fish and clean Dutch buckets.

Is cocopeat suitable as grow medium in Dutch buckets?

Coconut coir, or cocopeat, can work well as a primary or component growing media for Dutch buckets. Its moisture-retention helps buffer roots against temporary pump outages. Cation exchange manages pH shifts, too. Mix with additional aeration media like perlite or clay pebbles. Rinse cocopeat thoroughly before use to remove accumulated salts.

Is recirculation needed in a Dutch Bucket system?

Yes, recirculating nutrient solution is an essential aspect of Dutch bucket hydroponics for conserving water & nutrients and protecting root systems. Drain pipes return used solution to reservoirs for reuse rather than disposing excess drainage liquids. This closed-loop approach allows close monitoring of pH, EC and nutrient levels for precise crop control.

Filed Under: Hydroponics growing, Indoor gardening Tagged With: Dutch-Hydroponic-System, hydroponic-systems, small-hydroponic-systems

What is Vertical Herb Garden?

Roger Peters by Roger Peters | Last Updated: January 16, 2024

A vertical herb garden is an innovative way to grow herbs, vegetables, flowers, and other plants in a compact vertical space rather than a horizontal garden plot. As urban living spaces continue to shrink and more people want access to fresh herbs and veggies, vertical gardening is exploding in popularity as an easy, sustainable solution.

What is Vertical Herb Garden exampel 1

In this comprehensive guide, you’ll learn all about vertical herb garden benefits, appropriate structures and systems, essential growing tools, suitable plants, proper lighting requirements, effective irrigation and fertilization techniques, maintenance tips, and much more.

What Is a Vertical Garden?

A vertical garden, also called a vertical farm or vertical vegetation, is a nontraditional technique for growing plants in an upright vertical fashion rather than horizontal rows on the ground. This agricultural method allows for the cultivation of crops in vertically stacked layers commonly integrated into structures like the exterior walls of buildings, balconies, fences, columns, or freestanding vertical frames.

Indoor vertical herb garden exampel 2

Vertical garden systems take advantage of vertical space to increase planting area and enable urban agriculture, agriculture in space-challenged areas, or agriculture in cities. Without the footprint of traditional horizontal farming, a vertical garden can produce high yields within a small surface area.

The concept of vertical gardening leverages vertical structures to plant upwards rather than outwards to save space and bring food production and greenery into dense urban environments. This agricultural practice takes growing plants off the ground and moves it to vertically oriented surfaces by using vertical structures that can be attached to walls or specially designed vertical frames.

Structures like stacked crates, ladders, wall-mounted containers, hanging bags, and vertical growing towers allow gardeners to plant and grow vegetables, herbs, and ornamental flowers by using the vertical space available rather than ground space. Vertical gardens can be designed for growing inside or outside the home.

The vertical gardening method is a revolutionary way to sustainably produce food and revegetate urban environments. From balcony vegetable gardens to living walls filled with foliage, vertical gardening allows anyone to grow plants anywhere while benefiting from key advantages like maximized growth space, reduced weed and pest pressure, conservation of water and soil, and more.

46 Aerospring 27-Plant Vertical Hydroponics Or An Aeroponics Indoor Growing System

Aerospring 27-Plant Vertical Hydroponics Indoor Growing System Aerospring 27-Plant Vertical Hydroponics Indoor Growing System
  • Easy to use aeroponic system for your home
  • Fan - Grow Lettuce, Herbs, Veggies & Fruits
  • Grow smart & eat healthy, 20 gallon water reservoir Grow Tent, LED Grow Lights
Check Price
If you click this link and make a purchase, we earn a commission at no additional cost to you.

Advantages of Vertical Herb Garden

Vertical herb gardens offer numerous advantages that make them a smart, efficient way to grow herbs, especially for urban gardeners, small spaces, and anyone with mobility challenges. The following key benefits showcase why planting herbs vertically can lead to an abundant, successful harvest:

  1. Reduced physical strain. A vertical herb garden requires little bending, kneeling or sitting to tend it. By positioning the garden at a convenient height, maintenance tasks can be performed in an upright position. The reduced physical exertion makes vertical gardening ideal for seniors, those with limited mobility or back problems. Grow your herbs vertically to avoid strain and make gardening more comfortable.
  2. Higher yields. Vertical gardens allow for intensive planting in a compact footprint, resulting in higher crop yields per square foot. The vertical stacking means more plants can be grown in less space compared to a conventional horizontal garden. More planting area equals greater production from each plant, enabling urban gardeners and those with limited space to grow more herbs. Go vertical to increase your herb harvest despite restricted room.
  3. Enhanced accessibility. Vertical structures position plants at easily accessible heights for any gardener. Heights are tailored to those working the garden, making tending and harvesting simple without climbing or reaching uncomfortably. Customized heights cater to those using wheelchairs or with limited movement for true accessibility. Vertical herb gardens mean herbs within arm’s reach for anyone.
  4. Improved food safety. Elevating a herb garden improves drainage and air circulation around plants, keeping foliage drier. Drier leaves mean less mold, fungi and other pathogens. Excellent drainage also reduces root rot or damping off due to waterlogged soil. Cleaner plants and less disease lead to safer consumable herbs. Go vertical for the safety of harvesting healthy, pathogen-free herbs.
  5. Decreased noise. Elevating pots or planters off the ground can decrease ambient noise exposure for plants. This shields herbs from loud noises that may stress or slow their growth. A vertical garden acts as a sound barrier, protecting delicate herb plants. Grow herbs vertically for peaceful surroundings that promote better rest and development.
  6. Visually appealing. A vertically oriented garden stands out visually while taking up minimal floor space. The striking, modern look adds style and flair whether mounted indoors or outdoors. Visually interesting herbs become an artful focal point and conversation starter for any room. Go vertical for showstopping visual drama in your gardening design.
  7. Lower water needs. Vertical gardens often incorporate efficient irrigation systems to maximize water usage. Strategic watering delivers just the right amount to each plant while reducing excess water run off. With less wasted water, a vertical garden needs less overall irrigation than the ground-level equivalent. Go vertical to conserve water.
  8. Less soil erosion. Vertically stacked pots prevent soil disturbance from weather exposure and retain soil structure better than ground-level beds. The contained nature protects precious soils while reducing erosion and structural degradation over a growing season. Grow herbs vertically to conserve your soil quality for years to come.
  9. Increased airflow. A vertical herb garden on an exterior wall or vertical structure benefits from improved airflow on all sides of plants. This air circulation provides better light exposure and consistent drying while deterring mold, fungi, and pests. Abundant airflow equals healthier herb growth. Position herbs vertically to maximize air movement for robust plants.
  10. The obvious but essential advantage is the extreme space efficiency of going vertical. Garden beds stretched horizontally require substantial ground area that is simply not available to urban gardeners or small space dwellers. But vertically oriented gardens provide impressive plant totals in very condensed footprints. For city or apartment herb gardening, vertical growing is a compact solution.
AeroGarden Bounty Elite - Indoor Garden with LED Grow Light AeroGarden Bounty Elite - Indoor Garden with LED Grow Light
  • WiFi and Alexa Compatible, Stainless Steel Grow up to 9 plants, up to 24duim
  • Includes everything you need to grow
  • 50 watt LED Grow Lights, perfect spectrum for fast growth & big harvests
Check Price
If you click this link and make a purchase, we earn a commission at no additional cost to you.

Required Equipment for a DIY Vertical Herb Garden

Creating your own vertical herb garden at home is easy and affordable with minimal equipment needed. Whether building a freestanding vertical garden or installing one on a wall or railing, you likely already have many useful supplies. This straightforward beginner-friendly project takes just essential components and simple construction.

Vertical Herb Garden schema example vertical hydroponic plant wall

Before starting your vertical herb garden, gather these key DIY must-haves:

  • Vertical structure. Choose a vertical frame, hooks, netting, ladders, or other vertical structure to securely mount containers. Ensure the structure is study, sized appropriately and meets weight-bearing needs for the planned plants. Consider durability, spacing, sunlight exposure and design when selecting a vertical support. The structure forms the essential skeleton to position plants vertically rather than ground-level.
  • Growing containers. Attach pots, woven bags, crates, buckets or other vessels to the vertical structure to hold and grow herb plants. Containers should have drainage holes, be lightweight enough for the structure to hold, and made of weather-resistant material if outdoors. Match container size, depth and drainage factors to the chosen herbs’ needs. Containers enable easily moveable and customizable vertical arrangements.
  • Soilless growing medium. In lieu of heavy soil, select a lightweight potting mix that still provides nutrients, anchors roots and retains some moisture. Commercial mixes blend peat, bark chips, perlite and other amendments into an ideal consistency for container vertical gardening. Prepare containers with nutrient-rich, fast-draining medium tailored for herbs.
  • Simple fasteners. Use twist-ties, hooks, velcro strips, wire or other simple fasteners to attach containers and plants to the vertical structure securely. Fasten from multiple anchoring points for stability and to prevent crashing. Flexible fasteners also allow reconfiguring or adding containers easily. Don’t underestimate the need for effective fasteners when designing a DIY vertical garden.
  • Irrigation system. Incorporate irrigation tubing, drippers or sprayers to effortlessly water vertical plants. Drip irrigation delivers water right to roots without overflow or waste. Timer attachments automate watering for ease. Proper irrigation is key for vertical gardens that can dry out faster than in-ground beds.
  • Lighting gear. Boost sunlight with full-spectrum grow lights or neon strips with adjustable brightness. Mountable lights placed strategically fuel photosynthesis for indoor or outdoor vertical gardens, especially beneficial for low-light plants. Support vigorous herb growth with ample lighting from all angles.
  • Trellising/cages. Guide vining herb growth vertically with clipped-on trellises. Use tall cages to contain aggressive plants within bounds. Trellises boost yields for vining plants and keep them growing neatly upwards. Cages lend support and a neat, tailored look to vertical herb arrangements.
  • Wall brackets. For mounted gardens, use sturdy brackets designed to handle weight-loads of mature plants plus containers when watered. Bolt mounting boards to studs for stability and anchor L-brackets, rails and modular wall garden systems securely. Proper hardware keeps the vertical structure and valuable plants safely and permanently in place.
  • Back panels. Place moisture barrier panels behind a vertical garden installation to protect walls from moisture damage. Plastic, foam or waterproof courtyard board panels shield exterior or interior walls from soil, overflow and irrigation moisture. Prevent leaks, wood warping, mold and wall degradation, especially in humid climates.

Container Types for Herb GardensIndoor Outdoor Vertical Garden schema example hydroponic wall

When designing a vertical herb garden, select the best container types tailored to the available space, structure, and chosen plants. The vessels holding the soilless mix and herb roots come in many forms to facilitate vertical or wall-mounted gardens. Explore these popular vertical planter options for healthy, prolific herbs.

Gardyn’s Indoor Towers

Gardyn’s innovative indoor gardening system features stacked towers holding different plants in each level. The self-watering tower design provides optimal hydration and lighting to stimulate herb and veggie growth. Each level includes adjustable grow lights and proprietary liners to keep roots healthy. Gardyn’s plug-and-play towers make herb gardening clean, convenient and hyper-productive on your countertop.

The award-winning Gardyn system allows you to sustainably grow fresh herbs and vegetables all year using vertical smart garden towers. The modular tower units come in a variety of heights to suit your space constraints. Control light, temperature, nutrients and more from an easy app. Gardyn’s automated vertical gardens are the ultimate modern solution for urban herb gardening.

Hanging Wall Baskets

Indoor Vertical Garden schema hydroponic tree

Traditional hanging baskets instantly adapt to vertical gardening by mounting to exterior or interior walls. Line sturdy baskets with coir liner before filling with potting mix and herbs. The cascade of greenery and easy access makes wall-mounted baskets a favorite for small-space herb gardens. Match basket size to the weight load of mounts. Group colorful baskets together for artful displays.

You can retrofit classic hanging baskets as vertical planters combined with wall hooks, rails or brackets. Choose lightweight baskets with width and depth sized appropriately for trailing herb varieties. Include water reservoirs and line with permeable fabric before filling with potting mix. Mount bundles of vivid baskets to transform blank walls into an artful edible display. Position near kitchens or seating areas to stimulate use of freshly grown herbs.

Stackable Garden Pots

Stacking vertical planter pots offer flexible herb gardening with the option to add levels as needed. Interlocking plastic or ceramic pots in short tower arrangements suit patios, decks, windowsills and more. Choose planter pot towers with wide bases and drainage holes for stability and healthy roots. Stackable vertical planter pots lend height for more planting area when horizontal space is limited.

Vertical stacks with three to five growing levels mean up to double the planting area in any backyard or courtyard. Choose stackable planter systems sized proportionately when filled to prevent tipping. Include catch trays to protect floors from drips and drops from bottom pots. Elevate your harvest by incrementally adding stackable vertical garden layers as desired each season.

Rolling Cart Planter

Convert a wheeled utility cart into a mobile vertical garden for herbs. Use one with built-in shelves, or retrofit found objects like dressers or cabinets. Line cart levels with pond liner, landscape fabric or plastic sheeting to protect wood from moisture before filling. A rolling cart vertical planter travels anywhere and integrates charming shabby chic style.

Salvaged rolling carts become inexpensive vertical planters on casters. Their mobility keeps productive herbs within easy reach outside by the grill, along a deck, or shifted for sunlight exposure. Choose all-weather rolling carts sized appropriately when filled with soil and plants. Line cart levels first for efficient watering and draining to protect contents and mobility.

RDWC 5 Gallon bucket system scheme whith air pump and timer anf example plants in 4 plant buckets and 1 only nutrient bucket

Recirculating Deep Water Culture (RDWC) Hydroponic Grow Kit System Recirculating Deep Water Culture (RDWC) Hydroponic Grow Kit System
  • Reservoir Bucket Connected to 4 Grow Buckets
  • 400 Gallon/hour Circulating Pump
  • Large 5 gallon square buckets, pre-drilled
Check Price
If you click this link and make a purchase, we earn a commission at no additional cost to you.

What Herbs Suite Best for Vertical Garden?

When designing a vertical herb garden, select varieties that thrive rooted in pots rather than ground plots. Herbs suited to container living tend to have smaller root balls, grow quickly, and remain more compact. Choosing small-to-medium sized perennial herbs also provides the reward of recurring plants each year.

Consider these ideal herb varieties for beginner-friendly vertical garden success:

  1. A staple vertical garden herb, basil thrives in warm weather and functions beautifully as an annual replanted every spring. Columnar basils grow neatly upright, while traditional varieties reach 2 feet wide. Pinch back leggy stems to encourage bushy basil plants. Grow prolific basil anywhere with adequate sunlight exposure and container depth.
  2. Vigorous mint never stops growing once established, making it ideal for vertical gardens. The aggressive roots prefer containment away from open ground. Pineapple mint, spearmint, peppermint and more supply year-round brightness for cooking and tea. Prune back mint often and monitor for invasive overgrowth climbing nearby plants.
  3. Also known as cilantro, fast-growing coriander flourishes in cool weather and tolerates partial shade, making it a versatile vertical herb. Achieve higher yields by successional planting every few weeks to have micro-green coriander year-round. The shallow roots thrive in tight spaces as this quick herb goes from seed to harvest in under two months.
  4. A valuable culinary herb, parsley grows densely in vertical gardens for convenient harvest right into winter. Curly varieties offer compact growth under a foot, while Italian flat-leaf may reach 2 feet. Thrive in full sun and provide rich organic matter via trimmings. Reliable parsley greens up any vertical space with vitamin-rich, harvestable beauty.
  5. Flavorful oregano makes an excellent vertical garden herb in hot, sunny spaces with its trailing nature and drought-tolerance once established. Compact Greek or Italian oregano stay under 12 inches while vigorous golden and Mexican oregano may reach 2 feet! Prune long stems back regularly and harvest young leaves any time for intense aroma. Oregano thrives when slightly pot bound and overwinters indoors in some regions.
  6. As a woody perennial herb, Rosemary functions beautifully in vertical gardens with ample drainage year after year. Varieties like Tuscan Blue or Arp remain compact under 3 feet with upright form, while creeping rosemary trails elegantly. Transfer rosemary containers indoors through zone 5 winters, then enjoy this antioxidant powerhouse again each spring! Just don’t overwater rosemary vertically.
  7. Delicate yet hardy thyme persists for years in vertical gardens with minimal care thanks to drought and heat tolerance. The low mounds spread slowly to drape containers with foliage and purple flowers, attracting pollinators! Common thyme stays under 12 inches tall, but taller creepers like doone valley exceed 2 feet. Shear back thymes routinely to prevent legginess and woody stems affecting flavor.
  8. They deliver big perennial flavor in compact vertical gardens, ideal for urban dwellers and kitchen gardeners. Onion chives and garlic chives reach 10–12 inches tall for low-maintenance, continuous slicing. Violet blooms appear in spring. Best of all, cut chives continually at ground level, and they’ll keep growing. Position chives vertically near kitchen doors for instant seasoning.

Tips for Starting a Vertical Garden

Embarking on your first vertical garden adventure is thrilling, but can feel daunting too. Arm yourself with fundamental vertical gardening knowledge to sidestep beginner mistakes.

Start out right by following these key tips for launching a thriving, low-maintenance vertical herb garden:

  • Choose herbs that are easy to grow and useful. When deciding what to plant, stick with prolific herbs you’ll actually use and enjoy. Reliable starter herbs like Genovese basil, curly parsley, dill, mint, oregano and chives establish readily in vertical gardens. Focus on your favorite flavors for the most rewarding first harvest.
  • Water moderately daily. Unlike ground gardens, containers in vertical gardens dry out faster and depend on manual watering. Check soil moisture daily, water thoroughly without saturating mix, and invest in drip irrigation for convenience. Consistent moderate water prevents shriveling.
  • Cut back established herbs regularly. Maintaining vertical garden herbs through pruning ensures steady growth rather than bolting too quickly. Remove faded flowers, wilted stems and leggy offshoots routinely. Not only does pruning encourage Bushy replacement foliage but also provides harvestable herbs all season. Enjoy the built-in benefit of a continual harvest through simple cut backs of vertical herbs.
  • Ensure the wall or ceiling can support the load. When installing a permanent vertical garden, first confirm the structure can handle the weight. A filled 8-foot wall of mature plants and soil may exceed 300 pounds! Bolster backing, use sturdy brackets and hardware, and anchor into studs or rafters. Reinforce surfaces prior to mounting vertical gardens to prevent dangerous collapse or detachment.
  • Waterproof early to avoid damage. Whether indoors or out, keep walls or surfaces behind vertical gardens 100% moisture protected. Sheets of plastic, foam boards or vinyl courtyard wall coverings prevent leaks, drips, condensation and splash damage on wood, plaster or drywall. Waterproof at the start or permanent stains, mold, peeling surfaces or decay may result from unprotected vertical irrigation.
  • Ensure adequate light for plants. When siting permanent vertical gardens, conduct light tests beforehand using a meter if possible. While some herbs tolerate shade, most require at least 4 hours of direct sun daily for ample growth and flavor production. Track light across the potential wall space over several days before installing to prevent struggling, sparse vertical plants.
  • Harvest leaves correctly. Learn and follow each herb’s proper cutting technique to encourage steady regrowth after harvest. Cut most herbs just above leaf nodes but avoid taking more than 30% of stems at once. With basil, avoid stripping all leaves off stems down to sticks! Snip chives at ground level for rapid regrowth. Always use clean sharp pruners to minimize disease transmission while harvesting.
4Ft Vertical Raised Garden Bed – 5 Tier Food Safe Planter Box 4Ft Vertical Raised Garden Bed – 5 Tier Food Safe Planter Box
  • For Outdoor and Indoor Gardening
  • Perfect to Grow Your Herb Vegetables Flowers on Your Patio Balcony Greenhouse Garden
  • Well-built and sturdy - is built with high quality materials
Check Price
If you click this link and make a purchase, we earn a commission at no additional cost to you.

Ideas for Your Vertical Herb Garden

When envisioning the possibilities for your vertical herb garden, let creativity lead the way. Consider fun adaptations like converting household items into planting towers or crafting an artistic display on a wall. Vertical gardens allow for customizable designs to match personal tastes and available space.

Explore these innovative ideas to inspire your green thumb:

  1. Repurposed ladder garden. Give retired wood ladders new life as an efficient vertical planting structure. Securely mount the ladder horizontally to a wall or fence before filling the rungs with potting mix and herbs. Unexpected materials like ladders or crates often cost little or nothing to repurpose.
  2. Backdoor bamboo garden. Situate slender cylindrical vases, jars or conduit pipes stuffed with herbs between secured bamboo stalks right outside the backdoor. This natural vertical garden taps into Asian style using easily sourced materials. Cluster complementary plants like Thai basil, cilantro and chives for a themed fusion garden mere steps from the kitchen.
  3. Family tea garden. Create a custom afternoon tea garden for the family, featuring classic tea herbs and edible flowers. Mount a wire storage rack securely to grow chamomile, lemon balm, lavender, fennel and vibrant nasturtiums, pansies or violas conveniently together. Include teacups hooks to finish the charming vintage display.
  4. Pint-sized tower. Even tiny spaces can support petite vertical gardens. Try a slim wooden wine box tower anchored to a countertop or balcony railing. Rotate small herb varieties like thyme, oregano and chives through the split box levels each season for always-fresh mini harvests.
  5. Hanging bottle columns. Fasten collected glass bottled horizontally to fence posts or porch columns before planting with herbs and lettuces. Vary bottle shapes, colors and groupings for an artsy patchwork column garden custom to your style. Mix edibles with ornamentals, too, like petunias or vinca spilling from bottles.
  6. Rain gutter garden. Mount a cleaned-out metal rain gutter securely along a building eave or porch railing to invent an instant long narrow planter. Anchor drainage holes along the length before sowing productive cascades of salad greens, strawberries, bush beans or trailing herbs.
  7. Wheelbarrow garden. A stationary rustic wheelbarrow placed on cinder blocks crafts quick vertical growing space. Line the wheelbarrow bed with landscape fabric before filling with potting mix suitable for draining herbs like rosemary, thyme and sage. Position near entranceways or next to front stoops and paths for an old-fashioned country garden feel.
  8. Conduit tower. Lean multiples of white electrical conduit piping together into a tall tower before stuffing each tube with trailing flowering herbs like nasturtiums. For stability, anchor the base into a weighted bucket of cement or sand. The industrial chic metal tower will blossom wildly in striking vertical lines.
General Hydroponics Flora Grow, Bloom, Micro Combo Fertilizer, 1 gallon (Pack of 3) General Hydroponics Flora Grow, Bloom, Micro Combo Fertilizer, 1 gallon (Pack of 3)
  • Сomplete nutrient system
  • Highly purified concentrates for maximum solubility
  • NASAAntarctic research scientists choose flora series!
Check Price
If you click this link and make a purchase, we earn a commission at no additional cost to you.

FAQs

How does a vertical herb garden work as a system?

A vertical herb garden works as a system by utilizing vertical structures like walls, fencing, or freestanding frames to position plants stacked upwards rather than spread horizontally. Containers like pots, woven bags, or crates attach to the vertical framework and hold a soilless planting medium and herb plants. The vertical orientation saves considerable space while still producing abundant harvests.

What grows well in a vertical herb planter?

Small herbs with compact growth habits or trailing/cascading forms grow best in vertical gardens. This includes basil, mint, oregano, thyme, sage, rosemary, chives, cilantro, parsley, dill, marjoram, and lemon balm. Be sure to match sun and drainage needs of herbs to the vertical garden location.

Can you grow carrots in a vertical herb garden?

No, carrots and other traditional vegetable crops with extensive long taproots do not grow well vertically. The shallow depth of vertical planting containers cannot accommodate long carrot growth. However, vertical gardens excel at growing smaller, quick crops like salad greens, bush beans, strawberries, or radish.

Are these vertical planters suitable for a vertical vegetable garden?

Yes, the vertical gardening method works very well for compact, fast-growing vegetable varieties in addition to bountiful herbs. Leafy greens, green onions, baby eggplant, dwarf tomatoes, beans, peas, and radishes all thrive planted vertically. Just ensure the vertical structure, containers, and location meet crops' drainage, sunlight and irrigation needs.

Is a freestanding herb garden easy to maintain?

A freestanding herb garden can be relatively easy to maintain as long as you use good quality soil, fertilize when needed, ensure adequate sunlight exposure, and practice proper watering techniques. Proper drainage is also important to prevent root rot.

How do I water my vertical garden?

To water a vertical garden, use a watering can with a long spout to reach all areas, or install a drip irrigation system. Make sure not to overwater. Check if the walls or pockets seem dry before watering again.

Are the vertical planters made from food safe material?

Vertical planters from reputable brands are typically made from food-safe materials such as powder coated steel, plastics safe for food contact, natural fibers etc. Check the specifications of the product to ensure the materials used are food-grade and non-toxic.

Is there a difference between a vertical garden and vertical planters?

The main difference between a vertical garden and vertical planters is that a vertical garden uses the entire wall or vertical surface area, while planters are self-contained units that can be installed on walls independently. Vertical gardens incorporate the wall or structure into the planting bed while planters have their own beds, often made from plastic, metal, or other materials that can attach to the wall.

grow tent diagram scheme with grow lights, ventilation, plants and 5 gallon bucket systems

TheBudGrower Complete All-in-One Home Grow Solution 4x4x7ft- 2200W(2) TheBudGrower Complete All-in-One Home Grow Solution 4x4x7ft- 2200W(2)
  • LED lights specialty manufactured by VIVOSUN with Samsung LM301 diodes for FULL spectrum light
  • The industries most durable grow tent – heavy duty 1680d oxford cloth
  • Money & energy saving complete home grow tent kit
Check Price
If you click this link and make a purchase, we earn a commission at no additional cost to you.

Filed Under: Home gardening, Hydroponics growing, Indoor gardening Tagged With: herb-garden, how-to, vertical-garden

Ebb & Flow (Flood and Drain) Hydroponic System

Roger Peters by Roger Peters | Last Updated: January 15, 2024 Leave a Comment

Hydroponics is the method of growing plants without soil, using mineral nutrient solutions in water. One of the most popular hydroponic systems used by home growers and commercial operations is the ebb and flow, or flood and drain system. This efficient and customizable setup floods the plant roots periodically with oxygenated nutrient solution before draining the system again.

In this complete guide, we will cover how to design and set up your own ebb and flow hydroponic system at home. You’ll learn what materials you need, how to build or purchase system components, proper installation and setup steps, maintenance best practices, helpful tips and tricks, and even some DIY project ideas.


46 Aerospring 27-Plant Vertical Hydroponics Or An Aeroponics Indoor Growing System

Aerospring 27-Plant Vertical Hydroponics Indoor Growing System Aerospring 27-Plant Vertical Hydroponics Indoor Growing System
  • Easy to use aeroponic system for your home
  • Fan - Grow Lettuce, Herbs, Veggies & Fruits
  • Grow smart & eat healthy, 20 gallon water reservoir Grow Tent, LED Grow Lights
Check Price
If you click this link and make a purchase, we earn a commission at no additional cost to you.

What is the Ebb & Flow?

The ebb and flow hydroponic system, often referred to as a flood and drain setup, operates by temporarily flooding the grow area with nutrient solution before draining the system again. This allows plant roots to receive ample moisture and nutrients, without remaining saturated.

pump on Ebb and Flow Flood and Drain hydroponic system schema example

Inside an ebb and flow system, plants sit in a water-tight grow tray of some kind, containing a growing medium like clay pellets, perlite, vermiculite, or Rockwool cubes. Underneath the tray is a reservoir that holds the nutrient-rich water solution. A water pump turns on periodically to pump this solution from the reservoir up into the elevated grow tray, flooding the medium and roots. Then the pump turns off, and the solution drains back down into the reservoir.

pump off Ebb and Flow Flood and Drain hydroponic system schema example

These flood and drain cycles are precisely timed using either a digital timer or mechanical overflow, typically in intervals of 15 minutes to 2 hours. Frequency depends on factors like plant size, temperature, humidity, and growing medium. The cycles saturate roots while providing oxygen in between floods. Roots dangling into the water-filled tray also access nutrients and moisture directly.

This ebb and flow between moist saturated medium and short dry periods is what makes this system so effective. Growers can fine tune flood timing to prevent issues with overwatering or underwatering. The enclosed reservoir also stabilizes pH and EC levels in the nutrient solution.


8 AeroGarden Farm 24Plus with Salad Bar Seed Pod Kit

AeroGarden Farm 24Plus with Salad Bar Seed Pod Kit - Indoor Garden with LED Grow Light, Black AeroGarden Farm 24Plus with Salad Bar Seed Pod Kit - Indoor Garden with LED Grow Light, Black
  • Indoor Garden with LED Grow Light, Black, Automatic timer makes sure the lights go on and off
  • Adjustable grow height of 24Inch, and can be stacked with other Farm gardens
  • Includes two Salad Bar Seed Pod Kits, featuring 9 lettuce pods, 3 herb pods, and 12 tomato pods
Check Price
If you click this link and make a purchase, we earn a commission at no additional cost to you.

How Does Ebb and Flow Hydroponic System Work?

An ebb and flow hydroponic system uses a temporary flooding technique to deliver moisture and nutrients to plants before draining away again. This cycle of flooding and draining allows growers to precisely control conditions at the root zone for healthier, faster growth. Here’s a step-by-step overview of the flood and drain process:

  1. The nutrient solution starts in the reservoir, a tank that can be built directly into the system or housed in a separate component. This reservoir should be opaque to block light and prevent algae growth.
  2. Using either an electronic timer or a mechanical overflow valve, the water pump activates on a preset schedule. This water pump pushes the nutrient solution to the elevated grow tray above.
  3. The grow tray fills with the solution until it reaches a particular depth, defined by a standpipe. This floods the clay pellets, Rockwool, or other medium that the plants sit in. Plant roots become fully saturated during this flooding stage.
  4. After a defined period of time, the pump shuts back off, and the nutrient solution drains from the grow tray. Gravity pulls the solution back down the standpipe into the reservoir below.
  5. Plant roots are left damp but with access to fresh air again. The medium should drain fully before the next flood cycle begins.
  6. Consistent ebb and flow cycles like this nourish plants several times per day without risk of overwatering. The enclosed reservoir stabilizes pH and EC between floods as well.

This sequence optimizes moisture, oxygen, and nutrients at the root level. Growers can adjust flood timing and frequency to control the system and refine conditions even further.

grow tent diagram scheme with grow lights, ventilation, plants and 5 gallon bucket systems

TheBudGrower Complete All-in-One Home Grow Solution 4x4x7ft- 2200W(2) TheBudGrower Complete All-in-One Home Grow Solution 4x4x7ft- 2200W(2)
  • LED lights specialty manufactured by VIVOSUN with Samsung LM301 diodes for FULL spectrum light
  • The industries most durable grow tent – heavy duty 1680d oxford cloth
  • Money & energy saving complete home grow tent kit
Check Price
If you click this link and make a purchase, we earn a commission at no additional cost to you.

Benefits of Ebb and Flow Systems

Ebb and flow systems offer many advantages to both hobby and commercial hydroponic growers. These flood and drain setups give you more control over plant root zones compared to other popular hydro methods like deep water culture or nutrient film technique (NFT). The following are the top benefits you can leverage using an ebb and flow hydroponic system:

  • Precise control over watering cycles. The flood and drain functionality allows growers to customize moisture levels at the root zone based on plant needs, medium type, humidity, and other environmental factors. The automated system prevents issues with overwatering or letting plants dry out too long between waterings.
  • Stable nutrient solution pH and EC. Since water circulates from a covered reservoir during flood cycles, evaporation loss does not concentrate or deplete nutrients over time. This stabilized pH and EC results in optimal uptake of nutrients by plant roots. Reservoir solutions in ebb/flow systems typically only need topping off every 1–2 weeks.
  • Lower risk of root rot or fungi. Allowing plant roots to access fresh air again after a flood cycle helps prevent soggy soil and anaerobic conditions that encourage root disease. Good drainage is key, along with proper flood timing and frequency based on your setup parameters like humidity, plant types, and medium used.
  • Flexible customization with lower startup costs. Ebb and flow systems can be adapted for all types of growing methods, small home setups to expansive commercial systems. Basic ebb/flow kits are affordable or can even be DIY constructed at very low cost. Components are readily available and interchangeable, too.
  • Higher yields possible in small spaces. With plants sitting closer together and roots fully saturated each flood cycle, ebb and flow trays make the most of available grow space. Larger plants typically have to be spaced farther apart in other hydro systems.
  • Automation saves time and labor. Once calibrated properly, ebb and flow systems can operate automatically with less daily monitoring needed compared to hand-watering plants. This makes ebb/flow a great choice for busy growers.

2 aeroponic growing system AeroGarden Harvest Indoor example of growing in 8 weeks on the kitchen table, in the shade.

AeroGarden Harvest XL with Gourmet Herbs Seed Pod Kit AeroGarden Harvest XL with Gourmet Herbs Seed Pod Kit
  • Indoor Garden with LED Grow Light, Black
  • Grow up to 6 different herb, veggie, or flower varieties at once, year-round
  • Automatic timer lights go on and off. Adjusts for up to 18“ of grow height
Check Price
If you click this link and make a purchase, we earn a commission at no additional cost to you.

Drawbacks of Flood and Drain Hydroponic Systems

As with any hydroponic system, there are some disadvantages and equipment vulnerabilities to factor into your ebb and flow design, setup, and ongoing maintenance. However, the benefits of precise moisture control and stable nutrient reservoirs tend to make flood and drain a preferred system for both small and large-scale hydro growers.

Being aware of these key issues can help growers prevent crop losses:

  • Increased risk of power failure. Ebb & flow systems rely on electric pumps and timers for the automated flood cycles. Any extended power outage could disrupt the watering schedule and severely damage plants within just a day or two if backup power isn’t in place. Prevent issues by installing surge protectors and using battery backups or generators if possible.
  • More prone to clogging from solids or algae. The drainage tubings, channels, water pump, and flood table or tray itself are vulnerable to mineral sediment buildup over time. Regular cleaning and filtration are a must to avoid flow blockages. Maintaining good water quality and avoiding light exposure helps too.
  • Potential for large-scale failures. While commercial ebb & flow systems allow scaling up to flood hundreds of connected trays simultaneously, a central pump failure or timer malfunction could impact whole crops at once. Redundant pump systems help mitigate down-time if one component fails unexpectedly.
  • Higher startup costs than some systems. Constructing a properly sloped and sealed reservoir, investing in a sufficient water pump and backup systems, purchasing flood tables and the necessary tubing/plumbing to route water can require more sizeable initial investments. However, ongoing operating costs are low.
  • Odor potential. Stagnant water in pipe systems or grow trays between flood cycles could produce unpleasant odors from anaerobic bacteria buildup. Routinely flush lines and use beneficial bacteria to reduce smells.
  • Requires more space than other setups. The reservoir, plumbing, water storage if recirculating from a larger tank, plus the flood table itself all have a footprint. This can limit ebb and flow systems to larger indoor grows or greenhouses with sufficient floorspace to house components. Going vertical with stacking flood tables helps maximize yield per square foot if height allows.
  • Increased maintenance between crop cycles. Between plantings, the system apparatus requires breakdown for thorough cleaning to prevent salt buildup and remove plant debris in tubing or flood trays. Pump impellers and filter screens especially need inspection and occasional replacement when worn. Proper cleaning between crops maintains free flow and healthy roots.

5 AeroGarden Red Heirloom Cherry Tomato Seed Pod Kit

AeroGarden Red Heirloom Cherry Tomato Seed Pod Kit for AeroGarden AeroGarden Red Heirloom Cherry Tomato Seed Pod Kit for AeroGarden
  • Hydroponic Indoor Garden, 6-Pod
  • GERMINATION GUARANTEE, COMES WITH EVERYTHINGб Non-GMO seeds; No herbicides; No pesticides
  • WORKS WITH ANY AEROGARDEN
Check Price
If you click this link and make a purchase, we earn a commission at no additional cost to you.

What Does Flood and Drain Hydroponic System Consist Of?

Ebb and flow systems have a few core components that distribute and drain the oxygenated nutrient solution that plants depend on. Carefully constructing or selecting reliable system pieces ensures healthy root zones. Many parts can also be customized or built to suit personal preferences.

Aeration in Ebb & Flow Systems

Proper aeration is vital for the nutrient reservoir and pumping cycles in an ebb and flow setup. Dissolved oxygen keeps roots happy between flood pulses and prevents stagnant water. Many systems use air stones connected to air pumps that continuously bubble the reservoir. Some systems also utilize venturi air injectors built into the water return line headed back to the reservoir after a flooding cycle. This infuses fresh oxygen without the need for air stones.

Safeguarding oxygen levels minimizes chances of root rot issues. Matching your aeration method to reservoir size is key. Multiple air stones or pumps may be required for larger reservoirs supporting expansive grow systems. Always check that bubbles visibly churn the solution.

Submersible Pumps

Reliable water pumps drive the pulsing flood cycles that define ebb and flow systems. Industrial-grade submersible pumps housed right in the reservoir are commonly used. Outputs between 750–4500 gallons per hour supply most non-commercial systems. Pressure head height and tubing length will dictate necessary power, along with your flood tray size and desired fill time per cycle.

Quality pumps with built-in thermal guards protect against overheating or running dry when reservoir levels run low. Choosing reliable name brands also better prevents pump burnout before schedules require replacement. Install a pre-filter on pump inlets as well to catch stray debris.

Nutrient Solution Reservoirs

Custom reservoirs tailored specifically for hydroponics help simplify ebb and flow system management. Look for opaque or black containers that block all exterior light. Translucent reservoirs grow problematic green algae. Square Reservoirs also economize space versus cylindrical tanks.

Kits often include reservoirs, but standalone plastic or polyethylene containers work too. Ensure your reservoir capacity exceeds total system volume needed for flood events, including piping. Easy access ports on reservoirs simplify monitoring pH or EC levels too. Consider incorporating reservoirs directly into room design so they don’t occupy as much floorspace.

Timers

Digital timers automate the powering on/off of water pumps on predetermined schedules for flood cycles. Quality timers allow programming in minutes to match your system volume for drainage rates. Alternate timers tailored for hydro provide battery backup and retain programming if power cuts out to avoid pump burnout.

Mechanical overflow timers offer automated functionality without electricity too. Float valves detect reservoir levels, closing on max height to shutoff fills. They reopen once nutrient solution has drained again to a lower point. These passive timers work, but may not prove as precise for multiple short, shallow floods per day.

Containers

Flood tables or trays suspending plants above the reservoir come in many shapes, like rectangles or triangles. A smaller footprint Saves space while still having a large, open flood zone. Trays often incorporate built-in drain fittings to simplify plumbing assembly.

Consider stacking layers of flood trays to multiply growing area if ceiling height allows. Multiple independent flood trays can also branch from one reservoir. Just be sure pump capacity and tubing diameter suit added trays. Portable tray materials like plastic or molded polyethylene enable rearranging.

Tubing

clay pebbles for hydroponic system

Food-grade flexible PVC tubing or rigid PVC pipe carries nutrient solution to and from the pump, reservoir, and flood container combo. Outer diameter should exceed 16mm for unimpeded flow rates. Match tubing width to pump outlet for frictionless transfer without bottlenecks.

Configuring the high point halfway along delivery tubing encourages downward flow before and after, avoiding air bubbles stalling within pipes. Secure all joints with clamp fasteners to prevent leaks mid-cycle. Install drain line screens too to catch stray debris before reentry into the reservoir.

Overflow Tubes

Standpipes or overflow tubes are vertical tubes cutting through the flood table to define water height limits before automated drainage occurs. Water rises inside until hitting the bottom of this outlet tube. Adjustable siphon-breaks allow custom flood depth up to 4 inches for larger plants.

Using an elbow piece midway down the overflow tube helps prevent potential issues with unrestricted flow creating siphons. This safeguards against inadvertent drainage between intended flood pulses. Bell siphons alternatively harness intentional siphoning to trigger draining once flows reach siphon lips.

Growing Media

The inert media in flood trays supports plants while retaining some moisture after drain events. Expanded clay pellets and lightweight rock wool both work well to provide structure and moderate moisture. Avoid actual soil or small pea gravel not suited for recirculating hydro systems.

Mixing in a top layer of perlite can prevent surface drying between floods. An inch of loose vermiculite or coarse sand also helps defend flood zones from light while deterring algae growth. Find media depths between 2 and 6 inches to allow ample oxygen to roots.

Additional Materials

Quality ebb and flow systems incorporate a few extra components to complete functionality and safety. Full enclosures maintain clean water and a stable climate. Installing power protection and auxiliary power systems provide backup assurance too. Real time water meters help track volumes.

Lastly, select durable mounting hardware and fittings to assemble the unit framework plus tubing networks. Waterproof, corrosion-resistant metals withstand constant moisture while permitting future adjustments as needed when expanding or reconfiguring systems down the road.

Types of Ebb and Flow Systems

Ebb and flow hydro setups scale from simple, affordable home systems to expansive commercial farms with hundreds of connected flood trays that pulse nutrient solution multiple times per day. The type used depends largely on your growing space and production needs.

Bucket Systems

Easy home setups often start with 5-gallon buckets or storage totes functioning as both grow containers and makeshift reservoirs. Drilling drains partway up the side provides automated fill lines. Adding tubing, a water pump, air stone and timer transforms these vessels into productive mini ebb and flow units.

DIY bucket kits offer cheap starter platforms for hydroponic gardening using this same principle. As long as the pump exceeds the volume for flooding above the net pot area, standard containers can generate successful leafy greens or herbs indoors with minimal investment using a flood technique.

Flood Tables

More permanent installations incorporate purpose-built reservoirs and rectangular flood trays on raised platforms plumbed to distribute and retrieve water. Shallow tray depths between 4 and 16 inches take advantage of vertical space too. Flood tables come in set dimensions, but custom welding allows larger systems.

Commercial operations stack rows of flood trays to maximize yields per square foot. Trays often have built-in channel drains to simplify drainage back to the reservoir. Flexible construction makes reconfiguring layouts simple down the road. Programmable control panels make adjustments a breeze.

Drainage Methods for Flood and Drain Systems

Ebb and flow systems employ different techniques to handle the crucial drainage phase after each nutrient solution flood pulse in the grow area. Proper drainage fosters healthy roots and prepares for the next irrigation cycle. The most suitable method depends on factors like system size, vertical dimensions, level of control desired, and automation preferences. Here are popular drainage methods used in ebb and flow hydroponic systems:

  • Bell siphons. These curved pipes initiate rapid siphoning once flood levels make contact near the top opening. Tuned properly, the siphon effect can fully drain systems in minutes before breaking suction automatically. No power requirements make them popular for off-grid setups. Bell siphon dimensions must match system volume for optimal drain rates.
  • Gravity drains. Simple standpipes secured vertically through flood trays passively release water once pumps deactivate. Float valves can automate this drainage once hitting predetermined solution heights. No moving parts increases longevity but offers less control. Uncapped standpipes quickly drain systems fully.
  • Pump-assisted drains. Adding a secondary return pump plumbed to drain lines rapidly evacuates system volume once the fill pump shuts off. Automated sequencing efficiently empties flood trays faster for quicker turnaround times between floods. Does use more electricity running two pumps. Great for bigger systems.
  • Dutch pot system. A variation using gravity drainage through bottom-watered pots suspended above the reservoir. Floods raise water level enough to enter pot drainage holes, then recede through the same openings passively. Simple setup, but less precisely controlled compared to popular ebb/flow methods.
  • Nutrient film technique (NFT). This recirculating hydro technique doesn’t flood a drainage tray but flows a very shallow stream continuously past roots. This encourages faster growth with maximum oxygen. Requires gentle slope, low-profile growing beds and unimpeded drain lines.
  • Vertical channel systems. Drainage occurs vertically through a series of stacked, interconnected plastic trays or towers. Nutrient solution cascades from top-down by gravity through plant sites. Offers compact configuration but less control over individual plant roots.

How to Maintain Ebb and Flow Hydroponic System

Consistent maintenance keeps ebb and flow systems operating smoothly for the long run. Establishing regular inspection and upkeep steps as part of your management routine is crucial for sustaining healthy roots and fast vegetative growth:

  1. Regularly test and adjust nutrient pH/EC. Use a digital meter to track pH and EC levels a few times per week. Top off the reservoir with filtered, corrected water if readings drift out of optimal ranges between 5.5-6.5pH or 1.0-2.2 mS/cm EC. Letting levels fluctuate widely stresses plants.
  2. Inspect system components weekly. Check tubing, connections, flood tray condition, and water pump operation every 1–2 weeks. Catching issues early prevents bigger problems. Tighten any leaky fittings, remove obstructions, and replace damaged tubing when found.
  3. Clean pumps and lines between plantings. Fully drain the system, disassemble pipes/tubing, reservoir, and pump assemblies between crop cycles. Remove solid debris, scrub away salt buildup, and soak components in a sanitizing solution for 6–12 hours before rinsing thoroughly.
  4. Employ redundant equipment for reliability. Consider installing dual air pumps, backup water pumps, or even separate timers for critical flood triggering. This way, a single failure doesn’t disrupt the entire system. Automated battery backups or generators also protect during power failures.
  5. Purge plumbing lines routinely. Open end-line valves weekly to flush sediment that accumulates over time, preventing blockages. Flushing also exchanges old water for fresh, oxygenated solution. Just 10% volume daily improves plant health.
  6. Control water temperature consistently. Buy submersible heaters and cooling pumps if ambient temperatures swing beyond 65-80°F. Match equipment wattage to reservoir size for efficient stabilization. Insulate reservoirs to maintain stable root zones.
  7. Remove light exposure inside system. Paint containers black or locate them in dark rooms, only open briefly. Algae loves light and quickly spreads to clog components.
  8. Document system performance. Log pH fluctuations, flood timing, drainage rates, and plant progress. Tracking this data helps fine-tune flood pulses and quickly catch developing issues. Routine record keeping improves system function and yield over time.

RDWC 5 Gallon bucket system scheme whith air pump and timer anf example plants in 4 plant buckets and 1 only nutrient bucket

Recirculating Deep Water Culture (RDWC) Hydroponic Grow Kit System Recirculating Deep Water Culture (RDWC) Hydroponic Grow Kit System
  • Reservoir Bucket Connected to 4 Grow Buckets
  • 400 Gallon/hour Circulating Pump
  • Large 5 gallon square buckets, pre-drilled
Check Price
If you click this link and make a purchase, we earn a commission at no additional cost to you.

Optimal Plants for Growing with Ebb and Flow

Ebb and flow hydroponic systems offer a unique active growth environment ideal for many vegetable and herb plants. The cyclic flooding provides a constant moisture while also aerating the plant roots. Taking advantage of this method of growing allows a high level of control and impressive growth rates.

Some top plants that thrive in ebb and flow systems are:

  • Lettuce varieties. Lettuce grows quickly and can yield several harvests in an ebb and flow system. Leaf lettuce like oakleaf and romaine are great options. Lettuce thrives in the constant moisture that ebb and flow provides. Choose heat-tolerant lettuce cultivars for summer, or choose cold weather lettuce in winter.
  • Basil, mint, oregano, and thyme grow very well with the constant moisture ebb and flow systems provide. Being able to continually harvest leaves keeps the plants bushy and productive. Herbs will reward you with intense essential oil flavors in this active hydroponic growth. Pinch off flower buds to prolong leaf harvests.
  • The constant moisture helps prevent fruit rot and allows large, juicy berries to develop. Ever-bearing strawberries will produce fruit all season long in this system. Runners can be pinned down to fill out a system and maximize yields. Choose day-neutral varieties for best production.
  • The constant flow of oxygenated water and nutrients fuels vigorous plants. Both sweet bell peppers and hot varieties will set heavy yields of full-sized fruit. Use tall, narrow plant spacing to limit width while supporting taller plants. Use one plant per square foot as a guide.
  • Cucumbers grow exceptional lengthy vines crawling in narrow channels with very heavy yields of straight, sweet cucumbers. Mini greenhouse varieties stay compact with good centralized fruit set.
  • Bush beans. They set heavily with reliable moisture and can be succession planted for continuous harvests. Both green and yellow wax beans grow exceptionally well.
  • Small tomato varieties. Patio, grape, and cherry tomatoes can flourish with relatively compact root zones. However, larger indeterminate beefsteak types will require much deeper grow beds. Opt for compact, determinate paste tomato varieties.

441 AeroGarden Bounty Elite - Indoor Garden with LED Grow Light, WiFi and Alexa Compatible, Stainless Steel

AeroGarden Bounty Elite - Indoor Garden with LED Grow Light AeroGarden Bounty Elite - Indoor Garden with LED Grow Light
  • WiFi and Alexa Compatible, Stainless Steel Grow up to 9 plants, up to 24duim
  • Includes everything you need to grow
  • 50 watt LED Grow Lights, perfect spectrum for fast growth & big harvests
Check Price
If you click this link and make a purchase, we earn a commission at no additional cost to you.

FAQ

What grow mediums work best for Ebb and Flow systems?

The best grow mediums for ebb and flow systems are expanded clay pellets, perlite, vermiculite, rockwool cubes, or a combination of these. All provide structure while retaining some water and air. The lightweight expanded clay balls are reusable and allow plenty of oxygen to roots between floods.

Why do some hydroponic systems need air pumps?

Air pumps and air stones are critical components in many hydroponic systems, including ebb and flow setups, to vigorously bubble and circulate the nutrient reservoir. This dissolved oxygen is essential for healthy roots and prevents stagnant water that can lead to root disease. Active aeration between flood pulses also benefits plants.

What bucket size and rockwool volume is optimal?

For small home ebb and flow bucket systems, 5-gallon buckets paired with 2

What is the plant capacity of Ebb and Flow systems?

Plant capacity depends on the size of your system. Commercial systems fit up to 25–30 plants on some flood tables. Compact home systems may only accommodate 3–6 plants in a small reservoir/bucket setup. Typically, ebb and flow systems can grow 6–12 plants per 10 gallons of reservoir capacity quite effectively.

When to use Ebb and Flow hydroponic systems?

Ebb and flow systems work great for leafy greens, lettuce, herbs, tomatoes, peppers, and various fruits grown in aggregate media beds instead of continuous liquid streams. They can work for microgreens up through larger plants like mature tomatoes. The timed flood pulses make them superior for seedlings and transplants versus rapid growth phase.

Filed Under: Hydroponics growing, Indoor gardening Tagged With: ebb-and-flow, hydroponic-systems

  • Page 1
  • Page 2
  • Page 3
  • Go to Next Page »
  • Navigation
  • Privacy Policy
  • Search

Get Incredible Results With a Hydroponic System!

Copyright © 2020 - 2023 · AFFILIATE DISCLOSURE Some posts may contain affiliate links. hydrogardengeek.com is a participant in the Amazon Services LLC Associates Program, an affiliate advertising program designed to provide a means for sites to earn advertising fees by advertising and linking to Amazon.com.