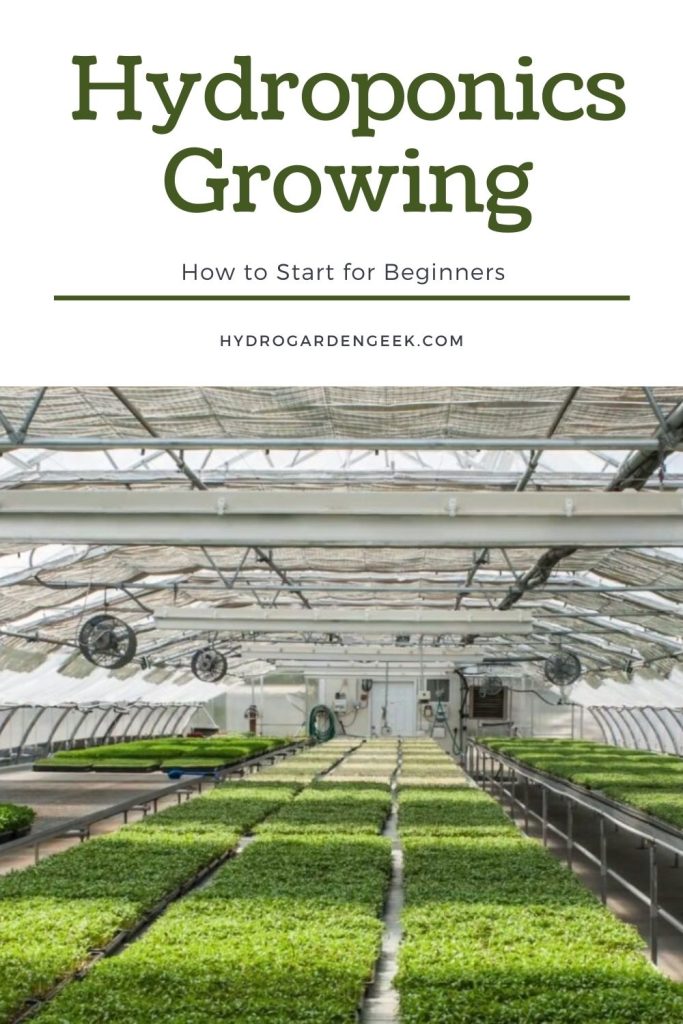
What is hydroponic growing? How do you grow plants without soil? And how do you get started?
Hydroponic growing is, essentially, growing plants in water. At its most simple, it means that the plants are suspended in a solution that provides all the nutrients it needs. The word was invented in the 1920s. The first published work on the methods is nearly 400 years old. And there is some evidence the technique is thousands of years old.
It’s a great way to grow plants. The roots don’t have to search for nutrients. So they’re small and efficient. It means the plant will often grow bigger and more quickly than in soil. You can grow all year round and reduce the risk of pests. And because you don’t need lots of soil for extensive roots, it takes less space and causes less mess.
How to Set up Hydroponics
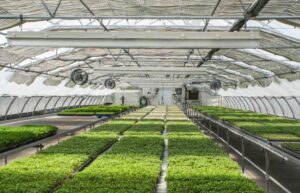
While commercial hydroponics systems look complex, the basics are simple. You hold the plant in place, without soil, allowing easy access to the roots for the nutrient solution. In my opinion, the differences are mainly how you’re going to use the nutrient solution within the system.
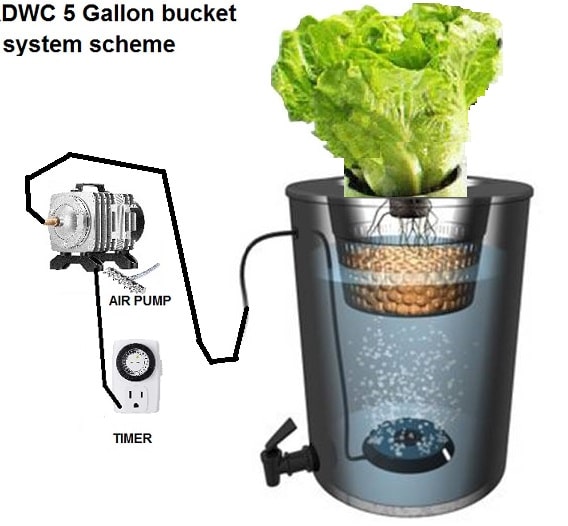
- One way is by submerging the roots. This is the most common system. It includes the water culture and flood and drain (sometimes called ebb and flow) techniques.
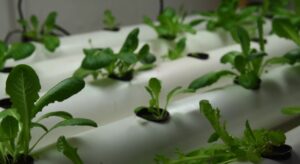
- Other methods use a growing medium. Sometimes this allows the plants to grow through the medium to reach the solution underneath. For example, the nutrient film technique. Others use the medium to soak and transfer the solution, as the drip or wicking methods.
- Finally, aeroponic systems leave the roots constantly exposed. Thanks to this, you can make sure they get plenty of oxygen. You use a misted solution to feed and prevent drying.
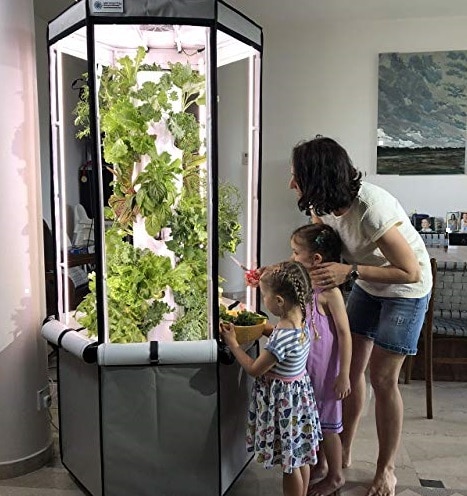
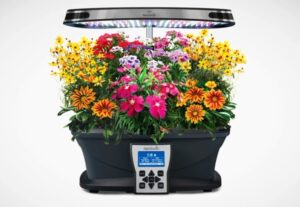
- Easy to use aeroponic system for your home
- Fan - Grow Lettuce, Herbs, Veggies & Fruits
- Grow smart & eat healthy, 20 gallon water reservoir Grow Tent, LED Grow Lights
How to Start Hydroponics
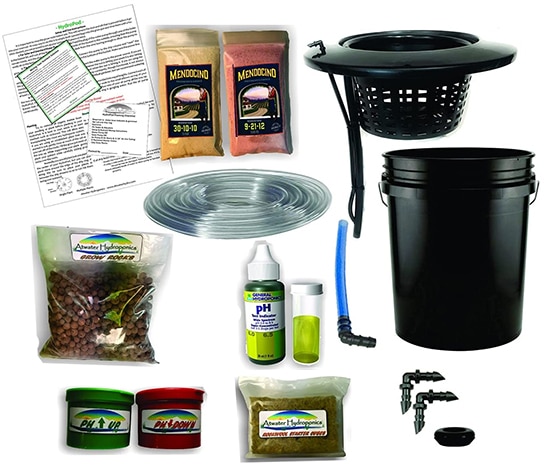
I think before embarking on hydroponic plant cultivation, it’s essential to consider all the necessary items you will need. To help you make an informed decision, we have compiled a list of these items for your convenience. Please take a look at the list below.
1. Support Structure
First, you’ll need something to support your plants. Exactly what you’ll need depends on what you’re growing and how you are growing it. However, it might be as simple as wire mesh to support a plant sitting over a bowl or bucket with the nutrient solution.
Plastic pipe or drain is a good option. It can serve equally well for a window ledge or in arrays for bigger growing projects. This works particularly well with systems that require a flow of nutrient solution.
2. Reservoir
Unless you’re using the water culture technique, you’ll need a reservoir for your nutrient solution. Again, this does not have to be anything special; a bucket or plastic storage box will suffice. The biggest consideration is likely to be size, which will dictate how often you’ll need to check and top up. Aesthetics might also be important if your system is in a living area, in a small apartment, for example.
3. Growing Medium
If you need a growing medium, there are plenty to choose from, from simple gravel to perlite or vermiculite. If you’re growing from seed, then you might want to consider special hydroponic sponges.
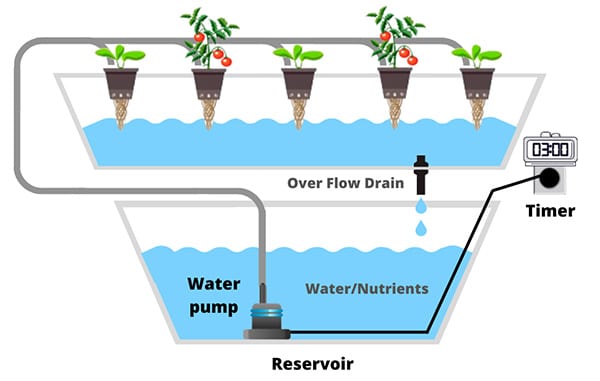
4. Water Pump and Tubing
You’ll need something to circulate the nutrient solution. Water pumps are available cheaply. Once you set them up, you can use them to keep the solution flowing. Alternatively, you can create a flood and drain system with the addition of a timer.
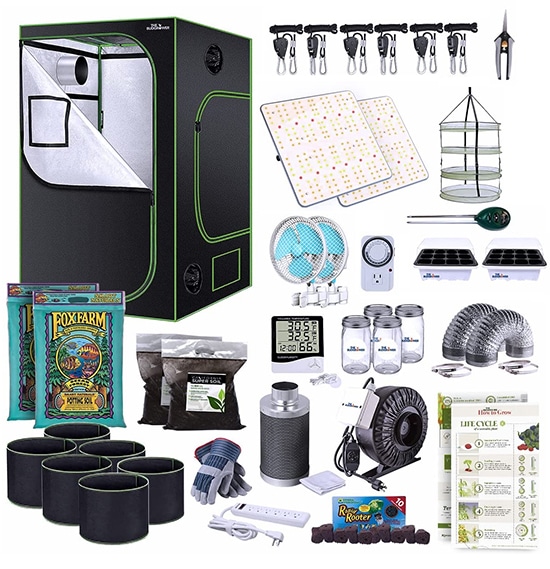
- LED lights specialty manufactured by VIVOSUN with Samsung LM301 diodes for FULL spectrum light
- The industries most durable grow tent – heavy duty 1680d oxford cloth
- Money & energy saving complete home grow tent kit
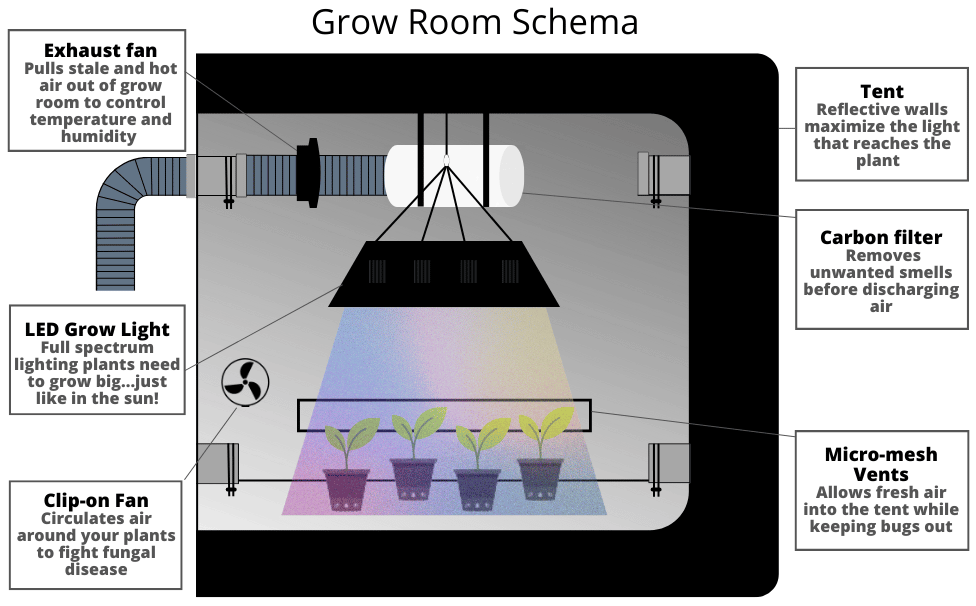
5. Light or Lighting
Plants need light to grow, ideally six to eight hours a day. If you’re setting something up with lots of natural light, on a windowsill, for example, you don’t need to think about it. If you’re hoping to grow in a room with few windows, you might need to consider extra lighting.
You can get a light for any set-up, from a USB powered desk-style lamp to large ceiling hung panels. These are very effective at replicating the effects of natural sunlight. Some of them even produce UV light. So you might need to be careful about exposure if it’s in a living space.
6. Nutrients
Finally, but most importantly, you’ll need a nutrient solution. These are simple to use, just mixing them with water. The best water to use in the solution is fresh rainwater. If you’re using tap water, you should test this first. Each area will have different compounds. The acidity is usually a little low, which will need adjusting.
- Buying nutrients designed for hydroponics are best. These will have the right nutrients and concentrations.
- It’s important to check the pH level of your solution.
- It should be between 5.5 to 6.5 or slightly acidic.
- And check if the temperature is right. This should be about 68º. It’s a little below room temperature. Getting the temperature wrong can damage or even kill the plants.
Cost
Hydroponics is a cost-effective way to grow anything, but there is a set-up cost. Depending on the method you use, this might be close to nothing. If you can repurpose items you already have, with $10-20 dollars for the pump and starter materials.
Kits, containing everything you need for small growing, are available for $50-120. If you’d like to grow on a bigger scale, then the costs can quickly mount. Add the cost of the initial set-up. It includes lighting. You can end up with thousands of dollars and high running costs afterward. However, this is offset by having a year-round food source.
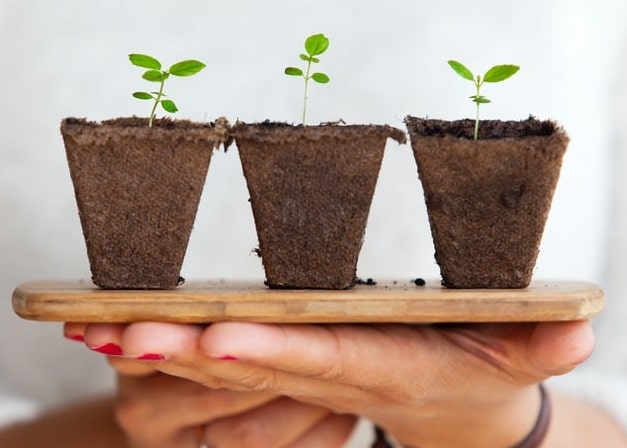
How to Start Seeds for Hydroponics
Using seedlings to start is ideal for beginners. I think that the hard work of germinating the seeds and getting them past their delicate early growth has been done for you. However, this approach has disadvantages. You are limited to the seedlings you can buy and because of the labor involved. These are significantly more expensive than seeds. Seedlings will also have undergone significant trauma with transplantation and transport.
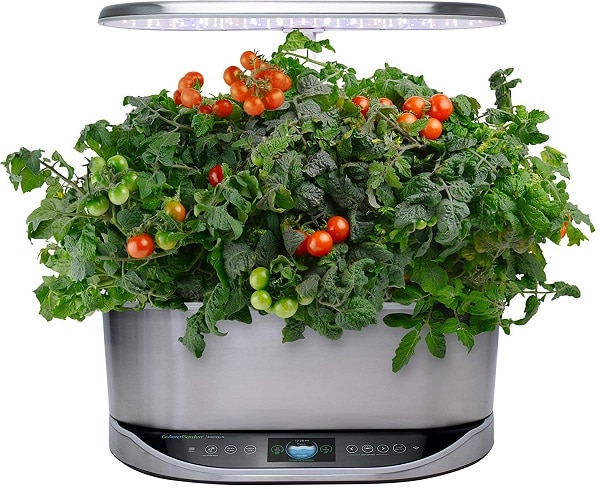
- WiFi and Alexa Compatible, Stainless Steel Grow up to 9 plants, up to 24duim
- Includes everything you need to grow
- 50 watt LED Grow Lights, perfect spectrum for fast growth & big harvests
To avoid these disadvantages, go for growing from seed. It gives you a greater range of growing possibilities. Moreover, it brings a greater sense of accomplishment.
- As you progress with hydroponics, you’ll definitely want to try cultivating something from seed.
- If you’re starting out, you might want to try lettuce, which is one of the easiest crops to grow.
- The processes are very similar for everything, though, and the key thing is care and attention.
Steps for Starting Seeds for Hydroponics
From my experience, it follows It will not take long before you are confident at recognizing when your crop is ready for each stage.
- First, you’ll need a growing tray; one under a clear cover is ideal to ensure it’s light and warm is ideal. If you’re growing in a cooler area, you might also need a warming mat. Check to see what temperature your crop likes. Lettuce, for example, ideally grows when it’s a little warmer than room temperature during the day.
- You can use starter cubes, like those made from rock wool. These won’t dissolve in water, so you don’t risk clogging up your system later. To begin, these should be soaked in water or in some nutrient solution (but only about half-strength) for an hour before dropping a few seeds in each hole.
- The water or solution will need to be topped up, but after about four days, you should see sprouting.
- An even easier way is to germinate the seeds in a Ziploc bag. Simply seal the seeds in the cubes in a bag with a bit of air and leave them in a dark, warm place. This emulates a greenhouse environment. Again, sprouting should take about four days. You’ll have to be careful to remove them promptly as the sprouts will need light.
- After the seedlings have been established, it’s time to start providing them with a full-strength nutrient solution to support their growth. Once you notice roots beginning to emerge from the bottom of the starter cube, you’ll know it’s time to transplant them. The time it takes for this to happen varies depending on the seed, but lettuce seedlings, they should be about two inches in height at this stage.
2 Extra Steps for Starting Seeds for Hydroponics
- Transplanting is simple and less traumatic for the plant than transplanting to or from the soil. It’s simply a case of making some space for the cube in your growth media and moving the whole cube over before gently covering it. You should water from above for the first few days to feed the plant while it develops its root system and finds the nutrient source you use.
- Once transplanted, you are almost there. Keep an eye on your nutrient solution and the system to make sure everything is alright. Having grown strong seedlings, you should soon see strong plants. If you’re growing lettuce, you can expect to start being able to pick leaves after around six weeks. Other crops will vary, but you can generally expect your first harvest in one to two months.
- Most efficient use of water compared to traditional gardening
- Dual outlet air pump, Nutrients are Included!
- Kit contains everything you need to start your own garden (minus plants and water!)
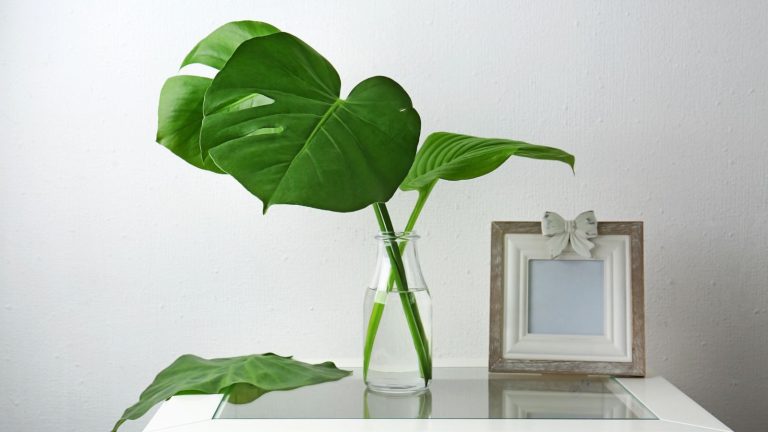
How to Transplant from Soil to Hydroponics
You can also easily transplant from the soil into a hydroponic system.
- First, and most importantly, you need to thoroughly wash the roots of the plant you are transplanting. This helps ensure that any soil doesn’t get caught up in your hydroponics system. It helps you also make sure there is no risk of damaging your pump. More importantly, it removes any bacteria and pathogens that might have been in the soil. If these get into a circulating nutrient solution, there’s a danger they can affect every plant in the system.
- Once washed, you can put it in your system. How you do this will depend on the type of hydroponic system you use and may be as simple as placing the plant into the basket or support. Alternatively, if you are using a growth medium, you might need to make some space and transplant by gently burying the roots.
- Like seedlings, you should top water for a short while until the roots grow and establish themselves. However, once in, your plant should thrive in its new home.
How to Fix Root Rot Hydroponics
You can generally expect hydroponic plants to be healthier than traditionally grown plants. Growing indoors, they are exposed to far fewer pests. They get their nutrients easily. They do not waste energy growing extensive root systems. However, they can suffer from root rot.
When the roots do not get enough oxygen allowing anaerobic bacteria to thrive, they can experience root rot. Unsurprisingly it tends to affect water culture systems the most. The first signs will be yellowing, drooping foliage, while the roots start to look slimy.
- If you have root rot, there are a number of products you can use. However, all they will involve some work in physically cleaning the roots to remove the ‘slime’ before soaking the roots to kill the bacteria.
- You’ll also have to sanitize your system to ensure it doesn’t return.
- Prevention is far better than cure. To avoid it, make sure you establish the roots well before changing nutrient solutions. This way, the roots will have developed their natural defenses against anything that might be introduced.
- You should also ensure that you properly aerate the water, especially in a water culture system.
Follow these tips for better results while growing your plants.
Conclusion
We hope that you’ve enjoyed this article and found it informative. Hydroponics is a great way to grow plants, they will grow quickly and yield lots of fruit in a small space, and you will get plenty of harvests each year.
You may want to grow indoors because you have no outdoor space. You may be impatient for results. You may be just intrigued by the idea of hydroponic growing. No matter what the reason, feel free to try hydroponics. This way, you can tell if it works for you or not.
If you are interested in hydroponics indoor gardening and want to grow veggies, herbs, flowers, leafy greens, and tomatoes all year long you can read this article about Aerogarden too.
What do you think? Let us know in the comments, and if this article was helpful for you, then, please, share.
Happy Growing!
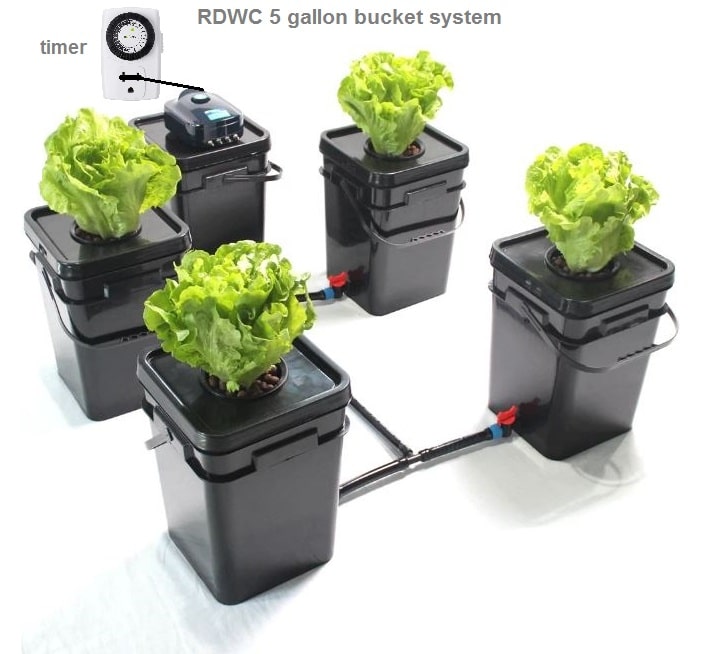
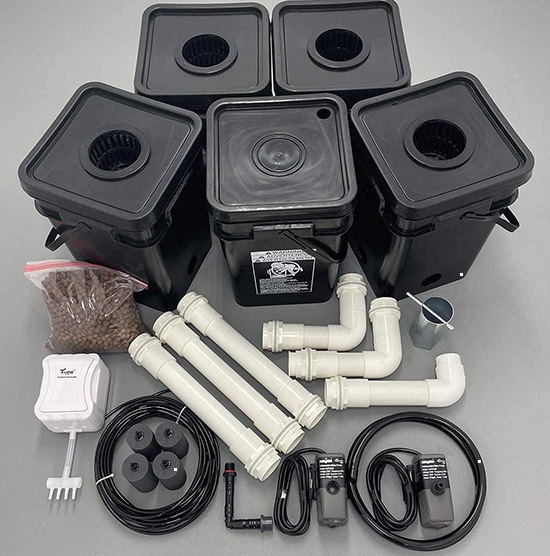
- Reservoir Bucket Connected to 4 Grow Buckets
- 400 Gallon/hour Circulating Pump
- Large 5 gallon square buckets, pre-drilled